Dead frontier 2: гайд для новичка
Содержание:
- Overview
- Dead Frontier: Outbreak 2
- Появляется чёрный экран в Dead Frontier 2
- Monday, October 18th, 2021
- Proficiencies
- Recommended Builds
- Friday, April 2nd, 2021
- Как это работает
- Stat Rolls[]
- Dead Frontier 2 выдает ошибку об отсутствии DLL-файла. Решение
- Character
- A More Complete List[]
- Sunday, July 4th, 2021
- Увеличить файл подкачки, если не хватает оперативной памяти для Dead Frontier 2
Overview
Objective: Stay alive for the whole night.
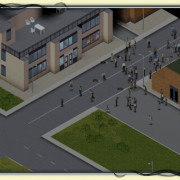
The game takes place in a small cottage right outside the city. You can freely move around the house, but not leave it. Various kinds of infected zombies will continually barge in through multiple doors and attempt to turn you into one of them or rip you apart.
You finally managed to escape the massacre at the extraction zone, which happened as a horde of infected from the nearby city followed you and devoured the rest of your squad right before they could reach the chopper… but dusk already fell upon the land. Luckily, there’s a small, seemingly empty cottage right outside of the city that could work as shelter.
The horde is still smelling and following you, thats only obvious — your way to fend them off is much less so. Your main weapon, a good old assault rifle ran out of ammo during prior fights and was only extra weight without ammo, so you dropped it during running. But due to a lack of material to barricade the house and its 3 doors with, all that remains useful for survival is your pistol, 3 magazines of 9 mm ammo and a suit of light armor, which is probably not enough to survive the night…
| Dead Frontier Night One Theme | |
Dead Frontier: Outbreak 2
It was revealed that the sequel to Dead Frontier: Outbreak would be released «in a few days» on the 20th of February 2010.
This continuation to the first game was released on 14 March 2010 on Kongregate and Newgrounds. Following the same style of its predecessor in that it is also text-based and has voice acting, and was created mainly for the purpose of raising awareness of Dead Frontier.
As again, giving a high rating for the game would be much appreciated.
Synopsis
The story follows the protagonist from the previous game, a survivor of the outbreak who also managed to save his wife. It should be noted that even if you failed to rescue her or if the protagonist died in the previous game, they would be alive in this game. The duo fled into the countryside, and found safety and refuge in the protagonist’s wife’s parents’ farm, which was fortified by her parents and surviving locals.
Unfortunately, the drinking water supplied to the farm had been contaminated with filth, owing to the fact that nobody was present at the sewage treatment plants. Many had been stricken with cholera as a result, including the protagonist’s wife. The healthier of the survivors drew straws to decide who would venture out to obtain antibiotics and medicines in order to cure the illness, and the protagonist draws the shortest straw; he would be the one to go out.
In the «perfect» story, the protagonist returns safely with the antibiotics and medication, along with some survivors if he chose to join them earlier on in the story. All but two of the most severely ill people recovered, and fortunately, the protagonist’s wife managed to survive through the cholera infection.
If he doesn’t get the antibiotics and goes back to the barn empty-handed, he steals a gun from the armory and kills his wife and himself.
Появляется чёрный экран в Dead Frontier 2
-
Драйверы установлены/обновлены, но Dead Frontier 2 всё равно отказывается работать
нормально? Тогда нужно проверить ПО, установлены ли вообще необходимые библиотеки? В
первую очередь проверьте наличие библиотек
Microsoft Visual C++
и
.Net
Framework
, а также наличие «свежего»
DirectX
. -
Если ничего из вышеописанного не дало нужного результата, тогда пора прибегнуть к
радикальному способу решения проблемы: запускаете Dead Frontier 2 и при появлении
чёрного экрана нажимаете сочетание клавиш «Alt+Enter», чтобы игра переключилась на
оконный режим. Так, возможно, откроется главное меню игры и удастся определить
проблема в игре или нет. Если удалось перейти в оконный режим, тогда переходите в
игровые настройки Dead Frontier 2 и меняйте разрешение (часто получается так, что
несоответствие разрешения игры и рабочего стола приводит к конфликту, из-за которого
появляется чёрный экран). -
Причиной этой ошибки также могут послужить различные программы, предназначенные для
захвата видео и другие приложения, связанные с видеоэффектами. А причина простая –
появляются конфликты. -
И напоследок – проблема, вероятнее всего, может быть связана с технической
составляющей «железа». Видеоадаптер может перегреваться, как и мосты на материнской
плате, что влечёт за собой уменьшенное энергопотребление видеокарты. Мы не будем
вдаваться в детальные технические подробности, поэтому просто рекомендуем в
обязательном порядке почистить свою машину от пыли и также поменять термопасту!

Monday, October 18th, 2021
DF1: SCOURGE OF THE SCARECROW
Starting early on Saturday October 23rd and continuing until Sunday November 7th you will be able to:
- Take on a brand new Scarecrow boss and it’s diseased minions
- Follow the clues and unlock a special reward in our daily scavenger hunt!
- Craft a brand new Halloween themed weapon with unique game mechanics
- Craft three new pieces of clothing
- Get a massive +200% EXP, More Loot Spots, +100% Weapon/Armour Loot AND +100% Ammo/Cash for the entire 16 days!
- Grab a new Limited Edition weapon and implant from the credit shop
The scavenger hunt runs from the 23rd until the 30th and begins at 6:00PM UTC each day in our Discord (https://discord.com/invite/deadfrontier2). The first person to solve the clue and find the Golden Pumpkin wins 1,000 credits and an engraved trophy. Note that even if you are unable to be online at this time you can still get the pumkin later in the day (until next reset). You will need to collect at least 5 Golden Pumpkins to craft the special reward. Any spare Golden Pumpkins can be used to craft smaller rewards. Be sure to check the df1-announcements channel for further details closer to the day.
Miss it at your peril!
Proficiencies
Proficiencies represent your character’s skill at using the Weapons available in the game. The six upgradeable proficiencies are Melee Weapons (Chainsaws, Melee Weapons), Pistols, Shotguns, Rifles, Machine Guns (Sub-Machine Guns, Rifle-caliber Machine Guns) and Explosives. Most weapons require a minimum skill level to be used, meaning that low-level characters will not be able to use these until they reach or surpass the appropriate skill level for the weapon.
Considering the increasing difficulty to level up with each gained level, it is often best to concentrate on one or two Proficiencies at most for new characters.
Important Notes
- All characters start with 5 points already placed into both Melee and Pistols. These points are permanently set by default — that is, they cannot be moved to other weapon proficiencies if you happen to purchase a Stat Reset (or Profession change). Remember that when you’re calculating the stat changes you want and/or need to make prior to a Stat Reset.
- You gain 5 proficiency points at every level up and have to invest them instantly.
- Starting from level 50 and onwards, you gain only 2 proficiency points.
Recommended Builds
Melee Based
Melee Weapons require 79 Critical Hits for optimal performance, and don’t care about Accuracy/Reloading at all. They are popular with new players due to their low cost and simple stat requirement, and can fit well with any knockback weapon type.
Melee + Shotgun + Explosives
Quite possibly one of the cheapest builds to run in the game. With Melee you are able to loot silently and without spending money on ammo, with Shotguns you have a great «Oh shit!» button you can switch to or as a boss hunting tool, and of course Grenade Launchers to either grind EXP with or to fire from a defend-able position. There isn’t much you can’t take on with this build, although you should make sparing use of the Shotgun while looting. Highly recommended for both new players and veterans alike.
Melee + Sub-Machine Guns + Explosives
One of the more effective critical builds, this build offers unparalleled looting potential. With Melee to kill everything silently, SMGs to quickly deal with small groups that have noticed you, and a GL to fire from over walls from a defended position it will be very easy to loot nearly any building you get into. Even if you are caught in a bad area, SMGs offer just enough damage to kill whatever happens to be in between you and the exit, provided you don’t get too careless.
Melee + Rifle-caliber Machine Guns + Explosives
Rifle-caliber Machine Guns are mighty grinding machines, but require large amounts of Strength and Accuracy to be effective. This build aims to skirt around that issue by pairing it with Melee Weapons that only requires 79 Critical Hit, and using machine guns with large capacity to reduce the need for Reloading investment.
Rifle Based
Rifles are excellent looting weapons with high accuracy, large capacity to compensate for their sluggish reload speed, and a damage progression that starts off far ahead in the early game and scales well into late game. Their high Critical Hit requirement and lack of ammunition early on may prove intimidating to new players however, and a well-thought plan is needed to circumvent these challenges.
Rifle + Sub-Machine Guns + Explosives
Rifles work the best with SMGs, as both require 112 Critical Hits and little Accuracy to be effective. Thanks to lax stat requirements and Rifles making short work of the Stockade-Fort zombies, this is one of the more newbie-friendly builds available.
Pistol Based
Pistols are split into 2 types: Revolvers which require 79 Critical Hit and high amount of Reload due to their poor capacity and reloading speed, and Semi-Autos which require 112 Critical Hit and much less Reload. Compared to the 2 other looting weapon types, Pistols are considerably harder to start with, due to early game Pistols having relatively low power and accuracy.
Pistol + Shotgun + Explosives
Classified as a «hybrid» build by other guides, this one utilizes a Critical Hit-based Pistol as the primary looting weapon, and a Strength-based Shotgun as the knockback weapon of choice. This build is ideal for players who want a cost efficient «survival» type of build, yet prefer the flexibility of Pistols over Melee Weapons.
Pistol + Sub-Machine Guns + Explosives
Taking Sub-Machine Guns allows you to utilize semi-auto Pistols, which do genuinely offer many advantages compared to revolvers such as higher DPS, better crowd control capability, larger capacity and faster reload speed. Overall, this build more or less follows a similar progression path compared to the Rifles + Sub-Machine Guns + Explosives build, and thus should make a good choice for newcomers.
Friday, April 2nd, 2021
Client V60
- Call of the Cult Easter Event preparations.
- Increased how much distance lootable ragdolls teleport in bounds.
- Added setting to toggle the noise filter graphic setting.
- Reduced Harvester attack tracking speed.
- Fixed a bug where bandits and players with PvP toggled on couldn’t shoot through loot spots.
- Fixed a bug where bandit ragdolls were causing performance issues on death.
- Fixed a bug that made trees remain bright in low brightness settings.
- Fixed a bunch more flickering textures and oddly lit floor tiles.
Please report any bugs found in #df1-bug-report so we can have a smooth event.
Side note: Wanted to say thank you for being so patient in regards to news on updates outside of tomorrows event. I will be talking about what I have been working on and future plans after this event has concluded.
Как это работает
Для эффективной прокачки опыта на боссах мы рекомендуем посещать только локации 10-го уровня, потому что именно там появляются нужные нам боссы
Сосредоточьте свое внимание на закусочных, магазинчиках и небольших апартаментах. Все эти локации довольно маленького размера, и в них гарантированно будут комнаты с боссами
Пальцы (Fingers), Мать (Mother) и Хор (Choir) гарантированно принесут вам по 480 очков опыта за каждое убийство и еще 50 XP за использование ключа от двери.
На уровнях ниже 10-го появляются только более сильные вариации горящих/облученных/кровавых/зараженных зомби, которые бывают в игровых областях от 15 до 20-го уровня. За них можно получить около 1/5 части опыта, который получается с босса, и лут в таких локациях падает тоже более низкоуровневый, так что не тратьте на них свое время.
Если же вы решите отправиться в области выше 10-го уровня, то там вас могут поджидать Джаггернаут или Усач (Tendril). Оба этих босса очень проворны и представляют большую опасность для выживших. Сложности могут возникнуть не только с ними. В высокоуровневых зонах через двери заходят горящие/облученные/кровавые/зараженные зомби более высокого уровня. Проблем с прохождением таких локаций может возникнуть очень много, а опыт с местных боссов совсем ненамного выше, чем с десятиуровневых.
Каждая область, за исключением Dallbow (1), Coopertown’а (5), Archbrook’а (5), Haverbrook’а (10) и Greywood’а (20), ежедневно после перезапуска меняет свой уровень. Обычно помимо Haverbrook’а есть еще хотя бы парочка локаций 10-го уровня. На приведенной ниже карте вы можете видеть, сколько комнат с боссами находится в каждой соответствующей локации.
Stat Rolls[]
Here is the list of possible additional Modifiers that can be rolled onto Shotguns weapons when the weapon is looted or enhanced.
Click to view Modifiers
- Notes:
- Legend:
- B base guaranteed detrimental modifier on some items of this type.
- B base guaranteed beneficial modifier on some items of this type.
- R randomly available beneficial modifier on some items of this type.
- U Unique-grade guaranteed beneficial modifier on some Unique-grade items of this type.
| Modifier \ Item | Head | Body | Legs | Hands | Feet | Melee/Chainsaws | Pistols/Rifles/Shotguns/SMGs/Assault Rifles |
|---|---|---|---|---|---|---|---|
| (Weapon) Body Damage | R+U | R+U | R+U | R+U | |||
| (Weapon) Attack Speed | R+U | B | R+U | R+U | R+U | ||
| (Weapon) Stun Duration | R+U | R+U | R+U | R+U | |||
| (Weapon) Knockback Distance | R+U | R+U | R+U | R+U | |||
| (Weapon) Surprise Damage | R+U | R+U | R+U | ||||
| (Weapon) Minimum Accuracy | B+R+U | R+U | R+U | ||||
| (Weapon) Maximum Accuracy | B+R+U | R+U | R+U | ||||
| (Weapon) Range | R | R | R | ||||
| (Weapon) Aim Speed | R+U | B+U | R+U | R+U | |||
| (Weapon) Reloading Speed | R+U | U | R+U | R+U | |||
| (Weapon) Ammo Capacity | R+U | R+U | R+U | ||||
| (Weapon) Noise Radius | R | R | R | R | |||
| (Weapon) Headshot Damage | R+U | R+U | R+U | ||||
| Damage vs Humans | R+U | R+U | R+U | R+U | |||
| Damage vs Infected | R+U | R+U | R+U | R+U | |||
| Damage vs Mutated | R+U | R+U | R+U | R+U | |||
| Health | R+U | R+U | R+U | R+U | |||
| Search Speed | R+U | R+U | R+U | R+U | |||
| Energy | R+U | R+U | R | R | |||
| Hydration | R+U | R+U | R | R | |||
| EXP Gained | R+U | U | U | R+U | U | R+U | R+U |
| Inventory Capacity | B+R+U | B+R+U | U | R | R+U | ||
| Incoming Damage | B | B+R+U | B+R | B | B | R+U | R+U |
| Incoming Stun Threshold | R+U | R | U | R | R | ||
| Incoming Stun Recovery | R+U | R | U | R | R | ||
| Bleeding Chance | R+U | R+U | R | R | |||
| Radiation Chance | R+U | R+U | R | R | |||
| Infection Chance | B+U | R+U | R+U | B+U | R+U | R | |
| Burns Chance | R+U | R | U | R+U | R | ||
| Movement Speed | B+U | B/B | |||||
| Jog Speed | R+U | R+U | R+U | R+U | |||
| Walk Speed | R+U | R+U | R+U | R+U | |||
| Sneak Speed | R | R+U | R+U | R | |||
| Sprint Speed | R+U | R+U | R+U | R+U | |||
| Sprint Duration | R+U | R+U | R | R+U | |||
| Sprint Cooldown | R+U | R+U | R | R | |||
| Dodge Cooldown | U | R+U | R+U | R | R | ||
| Dodge Duration | U | R+U | R+U | R | R | ||
| Health Restoration | R+U | R+U | R | R | |||
| Energy Restoration | R | R | R | R | |||
| Hydration Restoration | R | R | R | R | |||
| Energy Needs | R+U | R+U | U | R | R | ||
| Hydration Needs | R+U | R+U | R | R | |||
| Footstep Noise Radius | R+U | R+U | R | R | |||
| Visibility Range | R+U | R+U | R+U | R | |||
| Sneak Visibility Range | R+U | R+U | U | R+U | R | ||
| Kick Damage | R | R+U | R | R | |||
| Kick Stun Duration | R | R+U | R | R | |||
| Kick Knockback | R | R+U | R | R | |||
| Kick Cooldown | R | R+U | R | R | |||
| Lockpick Chance | R+U | R+U | R+U | R | |||
| Vehicle MPH (Miles Per Hour) | U | ||||||
| Find Ammo Chance | R+U | U | R+U | U | R | R | |
| Find Food Chance | R | R | R | R | |||
| Find Book Chance | R | R | R | R | |||
| Find Backpack Chance | R | R | R | R | |||
| Find Upgrade Chance | R | R | R | R | |||
| Find Drink Chance | R | R | R | R | |||
| Find Fuel Chance | R | R | R | R | |||
| Find Clothing Chance | R | R | R | R | |||
| Find Weapon Chance | R+U | U | U | R+U | R+U | R | |
| Find Medical Chance | R+U | U | U | R+U | R | R | |
| Find Common Item Chance | U | ||||||
| Find Superior Item Chance | R+U | R+U | R+U | R | |||
| Find Rare Item Chance | R | R | R | R | |||
| Find Elite Item Chance | R+U | R+U | R+U | R | |||
| Find Unique Item Chance | R+U | R+U | R+U | R |
Dead Frontier 2 выдает ошибку об отсутствии DLL-файла. Решение
Как правило, проблемы, связанные с отсутствием DLL-библиотек, возникают при запуске Dead Frontier 2, однако иногда игра может обращаться к определенным DLL в процессе и, не найдя их, вылетать самым наглым образом.
Чтобы исправить эту ошибку, нужно найти необходимую библиотеку DLL и установить ее в систему. Проще всего сделать это с помощью программы DLL-fixer, которая сканирует систему и помогает быстро найти недостающие библиотеки.
Если ваша проблема оказалась более специфической или же способ, изложенный в данной статье, не помог, то вы можете спросить у других пользователей в нашей рубрике «Вопросы и ответы». Они оперативно помогут вам!
Благодарим за внимание!
Character
How do I heal?
Go to your inventory and drag and drop medications onto your avatar. Lower level medicines are less effective. Medication that are at your character’s level or higher are effective, and paying for a fellow player’s services to help triples their effectiveness. Nevertheless, you will get the same amount of health points from medications at your level and higher ones (e.g. A level 21 player will get the same amount of points whether he uses bandages or morphine.) Hire a doctor from the ‘Services-Medical’ tab in the Marketplace in your outpost. Drag the medical item to the doctor’s red cross whom you wish to purchase services from and make sure you have enough cash on hand to buy the service and that the doctor is of appropriate level.
How do I repair my armor?
Similar to above, take your armor off, and have money on hand. Go to Marketplace- Repair tab, drag the armor to the icon to the right of the person who is high enough level to repair your armor. Alternatively if your character has the engineer profession (and providing you’re a high enough level) you can repair your own armor by going to your inventory and dragging the armor over the repair icon, but it will still take away 10% of your hunger. Similarly this can also be done with medication if you have the doctor profession, and also can be done with food if you have the chef profession.
This happens automatically. You have to be online in order to receive your items. You should find the new items in your inventory provided that you have the space for them. Remember that you still need chefs to cook the food and doctors to administer most medical treatments in order to get the most benefit from them. However, if you have no inventory space left, then the food/medicine you produced will not appear in your inventory.
Note : You have to log in once a day ( no need to log in thrice a day ) and you cannot produce anything if you are on critical or starving .
How do I use my class skills (doctor, chef, engineer)?
On your inventory screen, drag and drop the medical item, food and armor onto the Cross, Pot and Wrench icon, respectively.
To sell your service on the Marketplace, go to Marketplace > Selling > click Sell Services > input your desired price and click OK; to cancel the Service from Marketplace just click Cancel Sale.
How do I barricade?
- Get a claw hammer , nails and planks ( 1 nails , 1 planks ) .
- stand in front of a door … a sign will come up saying » press B to barricade » .
- Barricade ( by holding B ) until the sign goes away ( and the door is barricaded ) .
- Kill all zombies , so the captured area is safe .
If a sign saying » Press O to enter Outpost Mode » does not come up , its either because you missed a zombie ( zombies are everywhere … not just in the lootable rooms ) or because there is another door ( to prevent this , take a tour of the area and kill all zombies you see and if you see one door … and killed all zombies , then barricade ) .
Note : Houses almost always have one door . Therefore if you see a house and need to enter PO ( Personal Outpost ) mode , enter the house ( do not enter buildings or hospitals because they always have 2 doors … sometimes 3 ) .
How does the hunger system work?
There are 4 levels of hunger, Nourished, Fine, Hungry, and Starving. You lose 1% hunger every two minutes that you are in the game and 1% for every hour spent in the Outpost. Being Nourished gives you 125% xp, whilst starving gives you around 50% xp. Eating food will make you less hungry.
What does the Nourishment Level of food and the Healing level of medical supplies mean?
Foods’ nourishment level and healing items’ level needs to be higher than your level to have maximum effectiveness. From level 1 to 10, a player can eat chips for 15% nourishment, but from level 11 to 20, it will only have 3% nourishment value. They will then have to use at least level 20 foods, because level 10 foods have now dropped in effectiveness dramatically.
Help! I’m gaining experience very slowly! What’s going on?
You’re probably less than 75% nourished. If your nourishment is less than 75%, then you will gain less experience than you would have gained if you were fully «Nourished.» Also remember the «soldier» has a -20% exp disadvantage.
A More Complete List[]
Note: As an observer I have found this list to be incomplete. I’ve been making note of each of the head cosmetics in my spare time, and I will update it here again in the future when it is more complete. I realize pictures for each would be really helpful, but I’m too lazy.
There is also a armor set known as hazard armor:
Hazard armor (red, orange, yellow, green, turquoise, blue, purple, pink, white, black) which can be purchased for 800 credits for each set.
Here is the list in alphabetical order, with notes on known variants and colors.
Head:
Alien Mask
Anonymous mask
Balaclava A,B (black, …)
Bandana (black, red, …)
Beret (blue, …)
Bionic Mask
Bowler Hat
Clown Mask
Cowboy hat B
Exterminator Helmet
Fedora (White)
Flyers Hat
Gas Mask (blank, _E,F,G …)
Goggles (grey, brown, blue, red, …)
Hannya Mask
Hard Hat
Headscarf
Hockey Mask
Infinity Mask
Japanese Headscarf
Jester Mask
Karura mask
Kitsune Mask
Medieval Helmet (A, …)
Military Bandana (normal, Urban Camo)
Military headscarf (normal, Urban Camo
Military Helmet (_,_,C,D,E,F) (forest camo, green, grey)
Ninja Mask
Old top hat
Oni Mask
Ornate Helmet
Padded Coif
Plague mask
Pork Pie Hat
Potato Sack
Santa Hat
Scarf (Green, …)
Shaman Mask
Shemagh (A, B) normal, green, brown
Skii Goggles (blue, yellow, …)
Skull Mask
Tengu Mask
Tin helmet
Tribal mask
Tricorn Hat
Turban
Viking Helmet (A,B,C, … F, …)
Also, a note: Most, (if not all) helmets will ‘hide’ the player’s hair, but a shortened haircut is usually visible underneath. Most masks retain the players original hair. Some helmets cover the head entirely and as such do not have this feature visible, such as the «Ornate Helmet.»
Sunday, July 4th, 2021
There’s been some confusion around the way I worded my last post surrounding the Dawn weapons. No new Dawn (or Dusk / X-Dusk) weapons are going to get added. With that said, I am looking at balancing them out. I’m avoiding giving them a damage buff and aiming for a unique mechanic that makes them stand out.
Currently, I’m experimenting by giving them the ability to ignore PvE armour on infected (this includes shields) as well as some capacity increases. Armoured infected are more common in Death Row, so this should make Dawn weapons quite powerful and versatile in this end-game area without direct power scaling. For the Dawn Melee and Chainsaw weapons, the current idea is to lower their melee proficiency requirements to 0. This should enable a lot more players to be able to enjoy these weapons as even most end-game players do not have high enough melee proficiency to utilize them.
This is all subject to change during the testing period I mentioned in the previous post as I gather feedback. That said, some of these changes may go live before the update is out (stat-wise, not mechanic-wise). Due to the confusing wording, I just wanted to clarify what the plans around these weapons were.
Thanks.
— Clayton
Увеличить файл подкачки, если не хватает оперативной памяти для Dead Frontier 2
Чтобы компенсировать недостаток оперативной памяти, можно увеличить файл подкачки. Это позволит системе хранить часть необходимых Dead Frontier 2 данных прямо на жестком диске. Вот что нужно сделать:
- Открыть «Проводник»;
- Правой кнопкой нажать на «Этот компьютер» (или «Мой компьютер»);
- В контекстном меню кликнуть на «Свойства»;
- В открывшемся окне слева нажать на «Дополнительные параметры системы»;
- В открывшемся окне перейти на вкладку «Дополнительно»;
- В разделе «Быстродействие» нажать на кнопку «Параметры…»;
- В открывшемся окне перейти на вкладку «Дополнительно»;
- Снять флажок с параметра «Автоматически выбирать объем файла подкачки» (если есть);
- Поставить флажок напротив опции «Указать размер»;
- В текстовых полях «Исходный размер (МБ):» и «Максимальный размер (МБ):» указать в мегабайтах значение, равное половине объема оперативной памяти.
Следует понимать, что файл подкачки эффективен только тогда, когда системе не хватает оперативной памяти. Если компьютер имеет 8-16 Гб, то файл подкачки практически не используется. А при использовании SSD-диска в качестве системного наличие файла подкачки и вовсе может замедлить производительность Dead Frontier 2, поэтому не следует бездумно задавать большое значение файла подкачки.