Скачать плагин mycommand
Содержание:
- Converting to Essentials Economy
- Создание и настройка аккаунта
- Automated Backup
- Utility commands
- Configuration
- Waypoint System
- Advanced Grid Scan
- General admin commands
- Timed Cleanup and Triggered Cleanup
- Переменные параметры для настройки конфига плагина ServerSystem:
- Automated Restart with Notifications
- Ural Chat
- Плюшка
- Важные сервисные плагины
- Chat Information Commands with interval based repeats
- Player Login Tracking
- Bug fixes
- Block Enforcement
- Config Syntax
Converting to Essentials Economy
Converting to Essentials Economy from a currently supported system is fairly easy in most situations. However, the conversion process relies on Essentials having userdata for all players you wish to save the balance for.
Essentials passively saves a copy of players balances whenever the Essentials API reads a players balance. This can happen quite often on regular servers, meaning Essentials will often have a complete backup of your active Economy. To take a backup of all known players, you can use the /baltop command.
The /baltop command forces Essentials to read the current balance of all ‘known’ user accounts. This can take a little while if using a slow economy system such as mysql iConomy, or if you have had many users on your server. While baltop is running, your server’s performance should not be affected.
Once the baltop command completes (you should see a list of top balances), simply remove your old economy plugin and restart the server.
Note: If you are just switching to Essentials and Essentials doesn’t have a database of all your users (or you delete userdata often), there is no easy way to import players balances, since Essentials has no idea whose balances to look up.
Создание и настройка аккаунта
Хотите проводить видеовстречи с командой и совместно работать над документами? Узнайте о возможностях пакета Essentials и выберите версию, которая лучше всего соответствует вашим задачам.

Чтобы зарегистрироваться, вам понадобится только адрес корпоративной электронной почты, который вы сейчас используете. Ознакомьтесь с подробными сведениями и зарегистрируйтесь.
После регистрации вы и участники вашей команды сможете бесплатно пользоваться Essentials в течение 30 дней. По завершении этого периода с вашей кредитной карты начнут списываться средства. До окончания пробного периода вы можете легко отменить подписку на пакет и ничего не платить за работу с ним.
Если вы захотите отказаться от пакета Essentials, то легко сможете отменить подписку на него. Сделать это можно в консоли администратора Google.
Вы можете установить на свой телефон или планшет мобильные приложения для таких сервисов Essentials, как Диск, Meet, Документы, Таблицы и Презентации.
Automated Backup
This is an option that all administrators should use. It will automatically backup your world save files in a backup directory. It will also compress them down so they don’t take up too much room. And lastly this option will also cleanup old backups.
Options:
- BackupEnabled — This allows you to turn Backup off or on
- BackupCleanup — This allows you to turn Cleaning up of the backups off or on
- BackupCleanupTime — The amount of time, in days, that a backup will last before cleaned up
- BackupCreateSubdirectories — This option forces the backup to put a separate backup in a new directory each time it occurs
- BackupAsteroids — Enabling this option will make the backup process include asteroids in the backup file. If disabled, the .vx2 files will not be saved.
- BackupItems — This is where you define when you want a backup to occur. You specify the hour and minute of the day you wish the backup to happen. Items are defined as follows:
- Enabled — Enable / Disable this backup item
- Hour — The hour to run this item in the range between 0-23. If you specify -1 for this option it will run every hour
- Minute — The minute to run this item in the range between 0-59.
- BackupDateFormat — This allows you to set a custom date format for backup filenames.
Utility commands
| Command | Options | Example |
|---|---|---|
| /pos | (no options) | /pos — This gives the user his current X, Y, Z position in the world |
| /timeleft | (no options) | /timeleft — this gives the user the amount of time remaining before the next scheduled restart |
| /msg | /msg tyrsis testing a private message — This will send a private message to the user ‘tyrsis’ with the message ‘testing a private message’. This command requires the workshop mod to function properly. | |
| /faction | /faction hello everyone in my faction — This will send a private faction only message to all users in the same faction as the user sending it. This command can be shortened to /f | |
| /utility grids list | (page number) or dialog | /utility grids list 1 — This lists all your grids by name and id. If you have more than 7 ships, the ships are separated into pages. Use a number after /utility grids list to list that specific page. If you do /utility grids list dialog you will get your entire grid list in a nice little dialog. |
| /utility export server | /utility export server My Ship — This exports the ship «My Ship» to the server. The ships are exported to an «Exports» directory in the mods directory of the server under the username of the user who exported it. | |
| /settings getblockenforcement | (index) | Shows a simplified list of block enforcement rules set on the server in a dialog window. Run the command again with the number of a rule to get detailed information on it. |
Configuration
Config Settings
Essentials allows for spawning ‘unsafe’ enchantments in kits, but only if you edit the config.yml
To allow ‘unsafe’ enchantments in kits and item spawning you will need to change the following setting:
unsafe-enchantments: true
Warning: Mixing and overleveling some enchantments can cause issues with clients, servers and plugins.
Delay
You can set a delay or cooldown (in seconds) on kits to prevent abuse. A cooldown of ‘3600’ would prevent the kit being used more than once an hour. If you want a ‘One use kit’ set the delay to -1.
Kit costs
In the command costs section of the config.yml you can define costs for each kit, for example:
kit-tools: 100
Would make it so /kit tools charges the player $100
Newbie kit
If you are using the Essentials Spawn plugin, along with setting the a special spawnpoint or welcome message, you can also give new players a kit.
This can be used to give a simple set of tools to get the player started, or could be used to give special items such as a book of server rules.
newbies:
  kit: tools
Waypoint System
Waypoints are ways of placing hud markers at locations that appear for you at all time. They are personal and no one else can see them except the person who placed them. (This will expand to faction waypoints soon). Waypoints are not blocks, and you do not place them by hand, you place them via a command and use the coordinate system built into essentials (that displays at the top).
Options:
- WaypointsEnabled — Enable / Disables this option
- WaypointsMaxPerPlayer — This limits a user so they don’t create too many waypoints.
- WaypointsMaxPerFaction — This limits the amount of waypoints a faction can have.
- WaypointDefaultItems — Default waypoints given to users without waypoints
- WaypointServerItems — Default waypoints that can not be removed by users. All users will see these
Advanced Grid Scan
We have added an advanced grid scanning function. This obsoletes the /admin scan cleanup, and replaces it with a more sane version of that. The commands are:
/admin scan grids
/admin delete grids (uses the results from scan and just applies a delete)
If you run the scan by itself, it returns all ships. You then apply filters to the scan to weed out ships until you get a list of ships you want.
Filters
- terminal — The grid must contain a terminal block. These are blocks that can have ownership for example, cockpit.
- noterminal — The grid must contain NO terminal blocks.
- functional — The grid must contain a functional block. These are blocks that can be enabled / disabled. They are also terminal blocks.
- nofunctional — The grid must contain NO functional blocks.
- ownership — The grid must have at least one block owned by a player. This implies terminal, but also requires that the terminal be owned.
- noownership — The grid must have NO blocks owned by a player.
- power — The grid must have a valid power source. Valid power source is defined as an enabled reactor with uranium in it, a battery with a charge, or a solar panel.
- nopower — The grid must NOT have a valid power source.
- online — The owner of the grid must be online
- notonline — The owner of the grid must not be online
Options
These options can have fields with spaces in it, but if there are spaces, the entire option must be enclosed in quotes, for example: «hasdisplayname:Respawn Ship:exact»
-
hasdisplayname:(name of ship):(exact) — This option allows you to filter by the name of a ship. If you want to sort by a ship that has a space in it’s name, please enclose the whole option in quotes. Using the «exact» option also makes sure that it matches the name exactly. Without the exact option a partial match can occur.
-
hascustomname:(custom name of block):(exact) — This option allows you to filter by the custom name set on a block (ie beacons). If the custom name has spaces in it, please enclose the whole option in quotes. Without the exact qualifier, partial matching occurs.
-
ownedby:(name of player) — This option allows you to filter by owner of the ship.
-
includesblocksubtype:(block subtype name):(count) — This option allows you to filter ships by ensuring the ship has the block you specify here. The count lets you filter even further by ensuring the ship has multiple of that block. For example if you want to find ships that have more than 25 drills on it, you’d specify: includesblocksubtype:Drill:26 — This scans for all ships that has 26 or more drills on it.
-
excludesblocksubtype:(block subtype name):(count) — This option is the reverse of the last and filters ships if they do not have the block specified here. Count allows you to filter further by specifying that the ship must have less than count blocks.
-
includesblocktype:(block type name):(count) — This option allows you to filter ships by ensuring the ship has the blocktype you have here (different than subtype). The counts lets you filter even further.
-
excludesblocktype:(block type name):(count) — This option is the reverse of the last option and filters ships if they do not have the block specified here.
-
blockcount:(number of blocks) — This option allows you to filter ships that contain at least blockcount of blocks. For example blockcount:5 will return all ships with 5 or more blocks.
-
blockcountlessthan:(number of blocks) — This option is the reverse of the less, and filters ships that have less than the value specified for this option. For example blockcountlessthan:5 returns all grids with 4 or less blocks.
-
blocksize:(large, small, station, largeship) — This option allows you to filter grids depending on size of the grid
Examples
- /admin scan grids — Returns all grids
- /admin scan grids noterminal — Returns all grids without terminal blocks
- /admin scan grids noownership — Returns all grids without any owned blocks
- /admin scan grids nopower — Returns all grids without any viable power
- /admin scan grids «hasdisplayname:Respawnship:exact» — Returns all grids with the displayname ‘Respawnship’
- /admin scan grids ownedby:tyrsis — Returns all grids owned by the player ‘tyrsis’
- /admin scan grids includesblocksubtype:Drill:26 — Returns all grids that have more than 25 drills.
- /admin scan grids excludesblocksubtype:Beacon:1 — Returns all grids that do not have at least 1 beacon.
General admin commands
| Command | Options | Example |
|---|---|---|
| /admin backup | (no options) | Forces the server to take a backup immediately if you have the feature configured. |
| /admin restart | Restarts the server after a given time. Note: this will simply shut down the server unless you have correctly configured automatic restarts. | |
| /admin speed | /admin speed rexxar 10 — This will limit the player rexxar to 10m/s, regardless of if they are piloting a ship, sat as a passenger, walking, or using a jetpack. | |
| /admin delete floating | (no options) | Deletes all floating objects in the world, including ore, components, hand tools, and backpacks. |
| /admin stop | Stops floating objects, ships, or both that are moving and unpiloted. | |
| /admin notify | /admin notify Red 5 «test» — This will display a notificaion above the chat area in red texts that stays for 5 seconds. | |
| /admin version | (no options) | Prints a chat message with the current Essentials version. |
Credits:
Originally created by Tyrsis
Maintained by dodexahedron and rexxar
Timed Cleanup and Triggered Cleanup
You can setup timed and triggered cleanups based on the advanced grid scanning above.
Timed Cleanups
Timed cleanups occur at a timed interval. They are pretty straightforward, in that you specify a time of day, and it runs on that time.
Timed Cleanup Items Options:
- Enabled — Enable / Disable this cleanup item
- Reason — Text reason for this cleanup. This replaces %cleanup_reason% in a notification item
- RestartTime — Time of day this occurs using a 24 hour clock
- ScanCommand — This is the command used to scan / delete when the cleanup occurs. It is basically an /admin scan grids command like above, but you do not include the /admin scan grids part. For example: nopower noownership would be the same as /admin scan nopower noownership
Triggered Cleanups
These are cleanups that occur when a certian capacity is met. So if the ScanCommand returns a certain number of grids that’s greater than the capacity set, the cleanup is triggered.
Triggered Cleanup Items Options:
- Enabled — Enable / Disable this cleanup item
- MaxCapacity — This is the amount of grids required to trigger this cleanup
- MinutesAfterCapacity — This is the amount of minutes after the capacity is reach to run the cleanup
- Reason — This is a text reason of why this cleanup is occuring. It replaces %cleanup_reason% in a notification item.
- ScanCommand — This is the command used to scan / delete when the cleanup occurs. It is basically an /admin scan grids command like above, but you do not include the /admin scan grids part. For example: nopower noownership would be the same as /admin scan nopower noownership
Notification Items
These are items that let you give text notifications to users about pending cleanups. These occur a set time before a cleanup takes place. They will not run if the TimeBeforeCleanup is higher than the actual MinutesAfterCapacity for a triggered cleanup item.
Cleanup Notification Item Options:
- Enabled — Enable / Diable the notification item
- Message — Message to send to all users about the pending cleanup. Use the tag %cleanup_reason% which is replaced by the reason you specify in the cleanup items.
- MinutesBeforeCleanup — The amount of time before a cleanup occurs for this message to occur.
Переменные параметры для настройки конфига плагина ServerSystem:
%serversystem_money%: показывает неформатированный баланс.
%serverystem_formattedmoney%: показывает форматированный баланс.
%serverystem_drop%: показывает, может ли игрок сбрасывать предметы с исчезновением.
%serversystem_pickup%: показывает, может ли игрок подбирать предметы с исчезновением.
%serverystem_chat%: показывает, может ли место в чате исчезнуть.
%serverystem_interact%: показывает, может ли игрок взаимодействовать при исчезновении.
%serversystem_vanish%: показывает, находится ли игрок в исчезновении.
%serversystem_god%: показывает, находится ли игрок в режиме бога.
%serverystem_afk%: показывает, является ли игрок в режиме AFK.
Automated Restart with Notifications
This option allows you to schedule automated restarts of your server. Sadly the game is not memory leak proof, and a quick restart can fix a lot of issues. This option also comes with the ability to notify your users of impending restarts at timed intervals.
Options:
- RestartEnabled — This allows you to turn Restart off or on
- RestartAddedProcesses — This is a multline field that allows you to run things in between restarts. Each line is a separate process in the restart batch file.
- RestartItems — These items allow you to define notifications that occur before a restart happens. You set a message, you set the minutes before restart the message will be shown, and you can force a save or stop all ships. They are defined as followed:
- Message — This is the message that will be broadcasted to all users
- MinutesBeforeRestart — This is the amount of time before a restart that this message is sent
- Save — This option allows you to force a save
- StopAllShips — This option allows you to forcefully stop all ships that are not piloted
- RestartTimeItems — These items allow you to define a time of day of when you’d like a restart to take place. They are defined as followed:
- Enabled — Enable / Disable this restart time item
- RestartTime — 24 hour time of day when this restart should occur
Note that this feature restarts SESE only. For your server to restart completely, SESE should be launched with the autostart parameter, as follows:
c:\PathToSpaceEngineers\SEServerExtender.exe autostart instance=»instance name»
Ural Chat
Восьмой плагин — это UralChat. Этот плагин предназначен для контроля чата. С поморью него можно запрещать писать определенные команды и также просто слова цифры или набор цифре. Например запретить метерные слова и также слова типа (ip, 142412 ну и т.д.), а с команд /stop, //calc и т.п чтоб другие не могли пиарить свой сервер или крашнуть ваш сервер. Это очень нужный плагин если вы хотите поддерживать порядок в чате и на сервере.
Это не официальный плагин (написан любителями), его нет ни на Bukkit, ни на Spigot, но он подходит к любому из этих ядер. Также официальной инфы на которых версиях сервера он работает нет, у меня лично на 1.8 работает хорошо. Его надо искать на любительских сайтах или на русском форуме Bukkit, чтоб сэкономить ваше время, вот прямая ссылка на его скачивание.
Плюшка
Я решил рассказать чуток отойти от темы и пообщаться с вами, а также рассказать ище о одном плагине. Начнем с общения. Дело в том, что если вы прочитали статью то скорее всего хотите создать свой сервер. Но дело в том что в ютубе или в гугле нету нормальной статьи (для новичков в этом деле) как создать свой сервер, извините за выражение «через жопу» на компьютере или еще где-то, где сервер не будет работать круглосуточно, выдержит много игрок и т.п. Я могу поделится с вами опытом и рассказать понятно для новичка как создать свой собственный реальный сервер Майнкрафт, тесть сервер будет спокойно работать 24/7, выдерживать нагрузку игроков и можно будет поставить более 100+ плагинов. Конечно платить придется, но если хотите что-то получит придется что-то отдать, так что будьте готовы что всё бесплатно не будет. Я вам расскажу на личном опыте с чем вы столкнетесь, с чего начать, как понять что вам именно нужно, как работать с FTP, mysql и что это такое. Если хотите такое, то пишите в группу ВК или в виджет который у вас есть в правом нижнем углу. С радостью вам о всём подробно расскажу.
Теперь перейдем к плагину. Я его не внес в топ потому, что он у половины должен быть, это плагин на сохранение мира. Дело в том что сохранение мира может делать ваш хостинг, но для тех у кого авто-сохранения от хостинга нет, я расскажу
Плагин называется — AutoSaveWorld. Он сохранят через определенный интервал ваш мир (внимание! только мир, а не весь сервер с плагинами и настройкой). Если надо сохранять весь сервер, то делайте это через консоль (MultiCraft Panel), которую вам предоставит хостинг или через mysql или FTP
Bukkit (AutoSaveWorld) — ссылка (тык)
Spigot — работает с Bukkit плагином
Ну вот и конец статьи, если ты читаешь это, то ты скорее всего прочитал статью почти или полностью, спасибо за это. Надеюсь статья тебе помогла и понравилась. Если нашли ошибку то пишите нам в группу ВК или в виджет, постараемся как можно быстрее исправить. Ну а на этом мы прощаемся, всем успешного создания серверов и их работы.
Также можете посмотреть мое видео:
Важные сервисные плагины
AuthMe Reloaded
AuthMe Reloaded – распространенный плагин для авторизации в игре. Он не позволит выполнить в игре какие-либо действия, если пользователь не вошел в систему. За каждым игроком с уникальным именем пользователя закреплен его инвентарь, местоположение и настройки (статус, права на территорию и т.д.). Наверное, один из важнейших плагинов для любого сервера.
Версия игры: до 1.13 включительно
- Скачать для Bukkit
- Скачать для Spigot
Поясненение: Spigot и Bukkit – это программное обеспечение, которое позволяет расширять возможности ванильной версии Minecraft. Подобных программ много, но мы расскажем про плагины только для двух самых используемых систем при создании пользовательских миров.
LuckPerms
Плагин выдачи прав на сервере Minecraft. Дает возможность администраторам контролировать, какие возможности имеют игроки, позволяет создавать группы и выдавать права (как по отдельности, так и группам). Также подойдет для проектов, в которых у геймеров есть разные уровни доступа. Прост в использовании и универсален для разных платформ.
Версия игры: до 1.16 включительно
Скачать LuckPerms (версии для разных видов серверов)
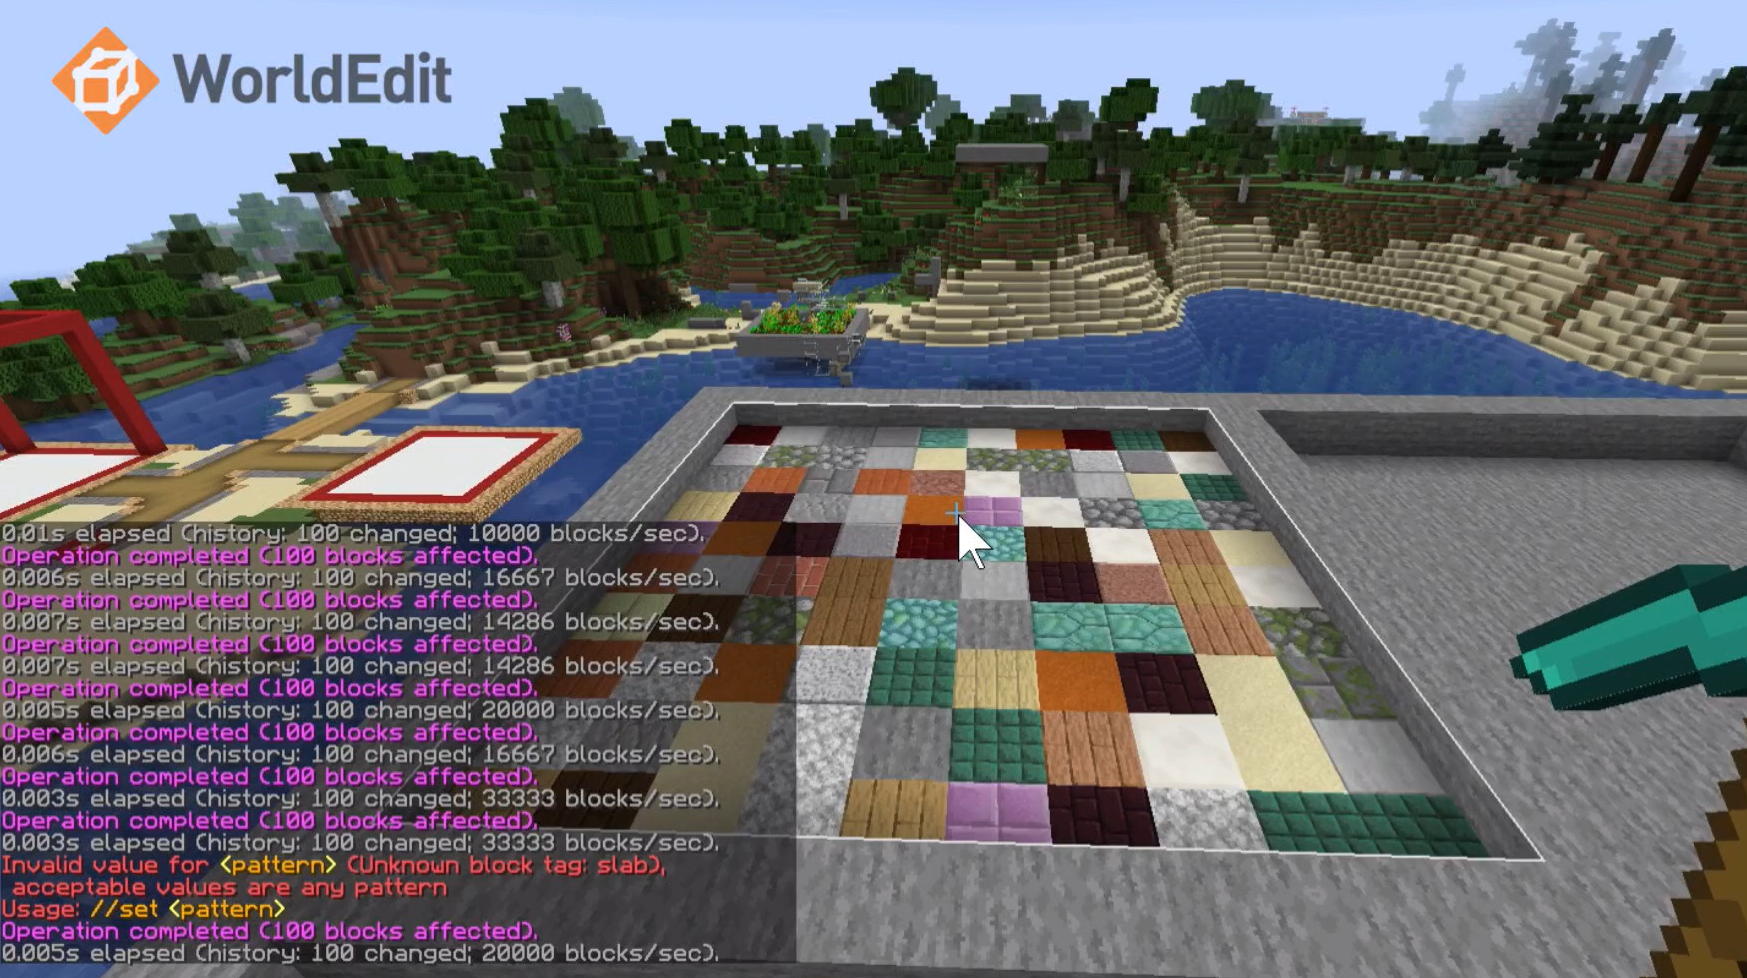
WorldEdit
WorldEdit – простой внутриигровой редактор мира. Плагин позволяет совершать следующие действия без приостановки работы сервера: видоизменять ландшафт различными инструментами, добавлять/удалять большое количество блоков, перемещать целые зоны по миру, создавать резервные копии отдельных участков и ликвидировать последствия действий гриферов. Поддерживает как онлайн, так и одиночную версию игры.
Версия игры: до 1.16 включительно
От 4 Гб ОЗУ, от 80 Гб на скоростном NVMe и стабильные 200 Мбит/сек
Узнать подробнее
EssentialsX
EssentialsX – этот плагин добавляет в игру более 130 команд. Команды, прописанные в плагине, упрощают модерирование сервера и позволяют быстро вносить изменения (от изменения погоды до генерации деревьев перед собой). Это же плагин позволяет телепортировать игроков по миру, перемещаться к ним или закидывать кого-то в случайную точку карты.
Версия игры: до 1.16 включительно
Скачать EssentialsX
Chat Information Commands with interval based repeats
This option allows you to setup commands that users can access that allow administrators to display server information to the user. The command /info is the base command, and the administrator then defines sub commands to display different types of information. For example defining a sub command ‘motd’ that gives a general message to users is setup with a sub command of motd. The user then types /info motd to see it. You can then specify if you’d like that message to be displayed for everyone at intervals. So for example you can set it up to send that message once every few hours, even if a player doesn’t type the /info motd command.
Options:
- InformationEnabled — This allows you to turn Information commands off or on
- InformationItems — This lets you define information commands. Defining an item is pretty simple.
- Enabled — Enable / Disable this information item
- IntervalSeconds — The amount of time it takes for this item to be broadcasted publicly. Set to 0 to not have it broadcast
- SubCommand — The command a user types to view this information item. If you leave this blank, users will not be able to view this command via /info, and will only see it if you use it in an interval.
- SubText — The actual text that is displayed with this item is queried using the /info command or broadcasted. You may use the %name% tag which gets replaced by the user’s name. This is a multiline text, and each line will be broadcasted individually per interval as well. So this allows you to setup messages that get sent in order.
Player Login Tracking
This option allows administrators to track user logins. This allows administrators to delete grids by owners who no longer login. The first time this is run, it will scan your server logs, and extract older login information so that your login list is up to date.
Options:
- LoginEnabled — Enable / Disable player login tracking. It is recommended to enable this as it adds a lot of functionality.
- LoginEntityIdWhitelist — This is a list of entities that will never be considered «inactive». This allows administrators to protect grids from inactivity scans / deletions
- LoginPlayerIdWhitelist — This is a list of player ids that will never be considered «inactive». This allows administrators to protect player grids from inactivity scans / deletions. Please note this is IDs and not player names.
Bug fixes
- now respects the config option. ()
- now works properly on all versions of Minecraft. ()
- , , and now have proper tab completion. (, , , )
- now forwards the provided cause to the subsequent event. ()
- Local chat messages are now only logged once in the server console, not twice. ()
- You can now set bed homes on older versions of Minecraft. ()
- Several permissions are now defaulted to false for supported permissions plugins. (, )
- The config option and the vanish/godmode PvP checks now ignore Citizens NPCs. (, )
- Arrows and tridents fired by can no longer be picked up. ()
- The default no longer has broken text formatting. ()
- no longer reveals vanished users. ()
- Ignored players are now stored as UUIDs, preventing evasion through username changes. ()
- Player logout times are now saved when the server shuts down. ()
- The server now waits for ongoing backup tasks to finish before shutting down. ()
- is now based on the current world’s sea level, rather than a fixed sea level of 63. ()
- You can now users who have 1-character-long names. ()
- and now target blocks better. ()
- s fired by CloudNet v3 are now silently ignored by EssentialsX. ()
- no longer requires an additional argument. ()
- Players can no longer send empty shout/question messages. ()
- Date diffs are now shown correctly throughout the plugin, including teleport warmups, tempmutes and tempbans. ()
- now encourages you to use the in-game command. ()
- The cooldown and teleport cooldown messages now have a red instead of an erroneous gold at the end. ()
- and now trigger s with the correct s. ()
- is now case-insensitive, in line with . ()
- EssentialsX now warns in the console if other plugins include modified bStats Metrics classes which do not respect the bStats config option. ()
- now removes skeleton horses that were spawned by a trap and tamed to skeletons. ()
- GeoIP: The plugin now respects and displays names in the locale. ()
- Spawn/XMPP: Commands are now hidden in 1.13+ autocomplete. ()
Block Enforcement
Block enforcement allows you to enforce block type counts on grids so that a user does not exceed a limit you set. If they exceed that limit, the new blocks are removed forcefully. This allow strict control of some lag inducing blocks so that users do not abuse them (for example drills, or turrets).
Options:
- BlockEnforcementEnabled — Enable / Disable this option
- BlockEnforcementItems — These are items that define the each block you wish to enforce
Block Enforcement Item
- Enabled — Enable / Disable this item
- BlockType — This is the block type that you’re enforcing. This can be a partial match against a block ID. Block IDs are the object builders of a block and can be found in your save. For example: LargeBlockBeacon is the subtype for beacons. LargeBlockDrill is the type for large drills.
- MaxPerGrid — This is the maximum of this type allowed per grid.
- MaxExceedWarning — (option not currently used)
- MaxReachWarning — (option not currently used)
Config Syntax
The config syntax for kit’s is fairly simple:
kits:
  <kit name>:
    delay: <delay between usage>
    items:
      - <item number> <amount> <meta>
      - <item number> <amount> <meta>
See also: Item Meta
Example
kits:
  tools:
    delay: 10
    items:
      - 272 1
      - 273 1
      - 274 1
      - 275 1
  dtools:
    delay: 600
    items:
      - 277 1 digspeed:3 name:Dwarf lore:Diggy|Diggy|Hole
      - 278 1 efficiency:1 durability:1 fortune:1 name:&4Gigadrill lore:The_drill_that_&npierces|the_heavens
      - 279:780 1
      - $500
  tophat:
    delay: 600
    items:
      - 298 1 color:255,255,255 name:Top_Hat lore:Good_day,_Good_day
  color:
    delay: 6000
    items:
      - 387 1 title:&4Book_&9o_&6Colors author:KHobbits lore:Ingame_color_codes book:Colors
The ‘dtools’ kit would give the user items with the id ‘277’, ‘278’ and ‘279’ which refer to 3 types of diamond tools. This command could be used every 600 seconds. Two of these items would be enchanted with special names and lore, while the other would be half used (data/damage value of 780). It also gives you $500 eco currency to use.
The ‘color’ kit would give the player a written book. This book would pull data from the ‘colors’ chapter of book.txt, which by default contains a list of color codes.
You can also use like {USERNAME} in kit meta data.