15 лучших сборок для pillars of eternity 2: dead fire
Содержание:
Companion reactivity[]
- When first being hailed by Gordy
«Hey, mister/miss, want to know a secret?» He wipes his nose with a sleeve. «I know a real good secret.»
- Pallegina: «Why do people have children, again?»
- Sagani: «Careful. I’ve traveled the continent, and the hardest bargains still come from my seven-year-old.»
- Edér: «Looks like we got a little hustler here. Someone raised this kid right.»
- Grieving Mother: «How nimble are young minds.» Her eyes gleam. «It has been long since I was reminded of a child’s precociousness.»
- After hearing about Gordy’s penchant for daggers and his proposition
«See, I know plenty about daggers, and I really, really want this one, and if you could just get it for me, I promise I’ll never, ever ask anyone for anything ever again.»
- Sagani: «In Massuk, we begin training our daughters with the hunting knife as soon as they can talk. Many can field-dress a hare before their tenth birthday.» She frowns. «I wouldn’t trust this kid with a butter knife.»
- Pallegina: Pallegina shrugs. «Sure, why not?»
- Edér: «I used to have a knife when I was his age. I don’t know a better way to learn what you should and shouldn’t stab. I say we give him a chance.»
- Hiravias: «Why do I get the feeling this kid would manage to hurt himself with a picture of a knife? Can’t we just scare the information out of this kid like responsible adults?»
- Kana: «March steel! The lad has good taste. I only ever had little shark-stickers, as a child. Mostly for oysters. Still managed to poke a hole through my palm once…»
- Grieving Mother: The Grieving Mother’s eyes glow with warmth. «Is not the determination of a child an amazing thing? Yet it quickly turns to mischief… untempered by age and experience.»
- After threatening Gordy
«How about you tell me that secret right now, before I get angry?»
- Sagani: «Was that really necessary, ?»
- Pallegina: «Gellarde. You’ve shown this small child who’s the boss around here.»
- Edér: «You should’ve let me know you wanted to shake down a kid. I got this thing where I blow pipe smoke in their face. They get the message.»
- Hiravias: Hiravias sniffs at the air and smirks. «Not sure if you were trying to make the kid soil himself but… congratulations? Maybe you should give him new pantaloons instead of a knife.»
- Kana Rua: «He’s only a lad, ! We can’t be that hard up for coin.»
- Grieving Mother: «What are you doing? Is there not enough violence and fear in the world? Leave the child be!»
- …and hurling him to the ground
«Don’t try anything like that again, or you’ll see what grown-ups can do with a nice, sharp dagger.»
- Grieving Mother: The Grieving Mother suddenly towers over you, her eyes burning. «Save your cruelty for our foes, Watcher. Do not raise your hand against a child again.»
- Aloth: Aloth’s eyes are cold and dark as he looks back at you. «Fye and shame on ye, wickt creature.»
- Pallegina: Pallegina makes a sweeping motion with her hand near her neck and angrily mutters, «Batetica.»
- Edér: Edér stares you down. «Hey. How about we save the violence for someone who’s a real threat next time, huh?»
- If you already learned his secret and ask him for something else
He scratches his head and wrinkles his brow. «Um… sometimes my dad goes to Ondra’s Gift without telling my mom. Some place called the Salty Mast.»
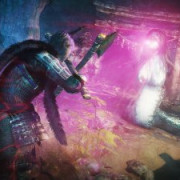
Место раскопок
Подробное прохождение этой локации и основного подземелья Арены можно найти в описании квеста «На мели». В рамках этого задания вам точно так же необходимо спуститься в подземелье, вход в которое находится неподалеку от клеток с анимансерами. Идите вглубь пещеры, и там же, где вы найдете главного анимансера Одериси, будет огромный адровый столб.
Когда вы приблизитесь к нему, начнется постановочное взаимодействие, в ходе которого вы сможете узнать, где находится Эотас, и даже попытаться поговорить с ним. Но что бы вы ни говорили и ни делали, это не повлияет на финал, так что в итоге вы все равно очнетесь у того же адрового столба. Можете рассказывать спутникам, что произошло, а можете утаить – для сюжета никакой разницы нет. Позже вы получите задание «Жилы Эоры», в рамках которого вам придется разыскать другие крупные адровые столбы архипелага.
Points of interest[]
- The White March — Part I
- You enter the village as it is attacked by a war party of crag ogres. To properly meet the denizens, you need to find Darzir, the leader of the ogres, and turn him into kibble.
- After the attack, the hut to the west is on fire. You can interact with it for a chance to save two villagers. See Durgan’s Battery for details.
- To the southwest, just next to the fishery, a villager runs away from a basket full of fish. Interact with it to meet Zahua, one of two companions available in the snowy wastes.
- To the southeast is the Temple of Ondra. Approaching it will trigger a short cutscene with Ista and Okrun.
- Yduran and his merchant cart is near the entrance to the village. Just a short way north is Thyrsc’s House.
- The White March — Part II
- The village inherits much of its layout from the previous expansion, as expected. The notable changes are that the Temple of Ondra is replaced by the Temple of Abydon, the ruined houses are replaced with yurts, with the northern of the two becoming Hamond’s Emporium, and that the Stalwart Mines in the northeastern corner are reopened.
- As you enter the village, you are automatically caught in a cutscene, with Deryan calling upon the people of Stalwart to confront the Iron Flail, a Readceran army massing outside the town. They are, obviously skeptical.
Background[]
Woedica, like the other gods, was created by Engwith out of the sacrifice of thousands of their souls at Sun in Shadow. Intended to be the strongest of the gods and to rule their pantheon, Woedica was simultaneously a patron of justice, oaths, and promises, and conversely, an entity willing to disregard the rules when it was necessary to accomplish her goals. She could do what she wanted with Eora at the apex of her power, which is why the other gods conspired to vanquish her, bringing the Queen down on even footing with the rest of them.
Yet even in exile, Woedica remained a potent god and the favored partner of Thaos, granting the Engwithan effective immortality by awakening his memories in each of his lives. He was devoted to her, favoring her specifically because of her wanton disregard for rules when they stood in the way of goals. The two were a perfect match.
Walkthrough[]
- Meet Kolsc in Esternwood. He will only appear if you have a Good/Neutral reputation with Gilded Vale. You may agree to help him or choose to give time to think about it. Either way, travel to Raedric’s Hold.
- Raedric’s Hold is a heavily guarded fortress, to enter you may choose to:
- Fight you way through the front door (difficult, but lots of loot). No need for a walkthrough this way as long as you know your tactics. But is recommended to have at least 3 fighters/barbarians in your team. Assuming you take the shortest route you will fight at least 10 Raedric’s Guards, 3 Spellwrigths, 6 Champions of Berath, 6 Archers, 6 Sellswords, 2 Priests of Berath, 1 Archmage and Raedric VII.
- Climb the west wall to reach the lower ramparts (requires either Athletics 3 or a Rope and Grappling Hook unless you want to get Fatigued. All characters in your party that have Athletics 5 or less will receive a level of Fatigue). You will fight at least 3 Archers, 3 Guards and 1 Priest of Berath on the walls.
- Sneak your way through the sewers at the east side of the hold (requires either Might 18 or a Prybar unless you want to get Fatigued. All characters in your party that have Athletics 0 or less will receive a level of Fatigue)
- Consider that you may change your approach at any given time until you meet Raedric.
- There are 3 routes to complete this quest:
- Kolsc route: Sneak through the Dungeons and ask for help from Nedmar (requires either Resolve 18 or Intellect 12 and Perception 12)
- Enter via the sewers.
- Kill all of the undead guarding the cells and to the sewer secret entrant. You may optionally kill Osrya.
- Free Giacco from his cell. Note that if the path to the secret entrance is not safe, Giacco will be killed! If he escapes successfully he will be found standing in the house at Magran’s Fork.
- Make your way to the kitchen. Ignore this floor and continue up the stairwell.
- Take the Berathian Priest Robes from the chest. Equip them to any character to blend in with the other acolytes. Keep in mind you will be stopped by some of the characters in this area, and you must pass a unique check for each to proceed unhindered (see the item page for more).
- Make you way to the chapel towards the southeast. Sneak and press the hidden button at the second skull.
- Talk to Nedmar and tell him Giacco is safe. He will give you a Master Key. (Note: Nedmar will allow you to rest in his room)
- Go to the Library, open the locked door and descend to Raedric’s Throne Room.
Osrya route: Sneak through the Dungeons and ask for help from Osrya (requires either Intellect 12 or Resolve 18).
- Enter via the sewers. This requires Might 18 to bend the bar of entrance by hand. Alternatively you may use a Prybar or swim through wearing Iverra’s Diving Helmet.
- Make your way to Osrya.
- Talk to her and agree to kill Nedmar. Alternatively, kill her, and discover the switch to open the secret passage (Mechanics 7) by going into stealth mode. (Note: You can agree to kill Nedmar to avoid immediate combat, ask her to let you rest then kill her, it’s not necessary to kill Nedmar even if you made an agreement with her)
- Take the stairs to the kitchen. Ignore this floor and continue up the stairwell.
- Take the Berathian Priest Robes from the chest. Equip them to any character to blend in with the other acolytes. Keep in mind you will be stopped by some of the characters in this area, and you must pass a unique check for each to proceed unhindered (see the item page for more).
- Make you way to the chapel towards the southeast. Sneak and press the hidden button at the second skull.
- Talk to Nedmar and kill him.
- Go back to Osrya. She will show you a hidden passage. Ascend to Raedric’s Throne Room.
Do whatever you want.
- Make your way combining sneaking and fighting. There is no alarm on the castle, so knocking off someone doesn’t put the castle on alert.
- Kill the weak guards in the courtyard, and enter through the wine cellar looking entrance on the left.
- This entrance has a full staircase from top to bottom with no guards. The top floor spits you out right next to the Robes of Berath.
- Ally with Osrya or Nedmar for access to the throne room.
- Once you’ve reached the throne room, talk to Raedric. You can either kill him or join him.
- If you kill Raedric. Kolsc will give you full access to the hold and you may loot everything. (Note: you can tell him you’re going to kill Kolsc to avoid immediate combat, make the necessary formation and attack, depending on the level of difficulty you will be mobbed to death otherwise)
- If you side with Raedric you will be sent to Magran’s Fork to hunt Kolsc.
- Kill Kolsc (Note: Before killing Kolsc, you can get Giacco to leave by talking to him, supposing you saved him, combat will start if you fail)
- Return to Raedric to receive your reward. Optionally you can kill him for +1 Cruel disposition.
15 паладинов/чантеров
Вы хотите, чтобы персонаж просто стоял там, в то время как все враги вокруг них умирают в огненном пламени праведности? Паладин/Чантер вас прикрыли. Он вращается вокруг злоупотребления заклинанием Brand Enemy и объединения мультиклассов Goldpact Knight и Troubadour 39; суммирование дебаффов на пробивание огня.
- Класс: Рыцарь Золотого Договора (Паладин)/Трубадур (Чантер)
- Приоритетные характеристики: Мощь, Восприятие, Интеллект, Решимость.
- Оружие: Магран и # 39; s Favor, Nerian’s Ward
- Головной убор: любой
- Нашейник: Strand of Favor
- Броня: патинированная пластина
- Кольца: Приз Куару, Кольцо Сосредоточенного Пламени
- Сапоги: Сапоги Камня
- Пояс: Любой
- Наконечник: Woedica 39; s Удушающая хватка
- Cape: Greater Cloak of Deflection
Также не забудьте взять эти заклинания, вы можете найти их как в дереве Рыцаря Золотого Договора, так и в дереве Трубадура:
- Дракон побежден, дракон вопит.
- Щит трескается.
- Их защитник в одиночку вырвался против Орды.
- Враг-заклятый враг
- Отпрыск пламени
- Вдохновленная защита и Стоическая сталь
- Аура Рвения
- Добродетельный Триумф
- Стиль оружия и щита
- Глубокая вера
- Рефлексы Змеи
Общая информация[]
Каждая постройка в замке даёт прибавку к таким параметрам, как престиж и безопасность.
На сумму налогов напрямую влияет безопасность, она также помогает сократить число «плохих» случайных событий, а престиж увеличивает число «хороших» событий и тоже повышает налоговые поступления. Также без одних улучшений не добыть доступ к другим (например, построить Тренировочную Площадку, пока не будет починен Внутренний Двор).
Отдых и отряд
Эта крепость — отличное место для отдыха отряда. Чтобы не бегать по тавернам, вы можете отдыхать в своей крепости (для этого необходимо открыть необходимые сооружения). Открывая улучшения в замке, отряд будет получать всё новые и новые бонусы за отдых (прибавки к восприятию, выносливости и так далее). Так как ваш отряд вмещает только 5 человек, остальных (если таковые имеются), вы можете оставить в крепости и отправлять их на задания, либо менять членов отряда в зависимости от поставленных целей. Чтобы отдохнуть, вам нужно зайти в домик под названием Брайтхоллоу (предварительно восстановив его), подняться на второй этаж, войти в первую дверь слева и щёлкнуть на большой двухместной кровати. Или нажать в любой точке Каэд Нуа на иконку «Кровати» расположенной на основной панели вместо иконки «Привал» (припасы для привала).
Сооружения и улучшения
Хоть улучшения и занимают много времени и стоят денег, зато можно улучшать замок столько душе угодно, лишь бы денег хватило. И нам не придётся дожидаться в крепости, пока они строятся. Можно спокойно продолжить свои приключения, а по завершению улучшений нам придёт послание.
Строительство новых сооружений в замке даёт возможность открывать различные улучшения (бонус к отдыху на территории замка, проход к новым локациям, возможность держать пленников в темнице замка), а также повышать безопасность своей крепости.
Улучшая баррикады, вы сможете защищать свой замок от нападений, которые происходят регулярно. Так же помните, что построенные сооружения могут разрушить во время осад и вам придётся отстраивать их заново.
Наёмники и приключения
В крепость можно нанять наёмников: они будут сторожить нашу крепость, давать бонусы престижа и безопасности, но за их работу придётся им заплатить. Наёмник может оставить замок, если вы перестанете ему отдавать его жалование, но есть и такие, которые будут ждать, но при этом не давать никаких бонусов. Также в замке регулярно появляются приключения (задания), на которые вы можете отправить героев из своей команды. На выполнение каждого задание устанавливается время, как и на строительство сооружений. Во время прохождения приключения, героя нельзя взять к себе в отряд для продвижения по сюжету.
Пленные и подземелье крепости
В вашем замке есть большое многоуровневое подземелье — Бесконечные пути Од Нуа, в котором вы встретите много различных тварей, а также боссов (на каждом уровне 1 босс). Подземелье даст вам возможность прокачать своих персонажей, а также вынести ценный лут. Если вы зачистили подземелья своей крепости и сделали там тюрьму, то по ходу своей игры, вы сможете взять в плен некоторых персонажей вместо того, чтобы убить их. Некоторых можно будет использовать в конце игры. Ну и конечно же, уровень безопасности крепости должен быть достаточно высоким, иначе ваши пленные могут сбежать.
Производство ингредиентов
Чуть ранее мы упоминали о том, что улучшение крепости позволяет производить ингредиенты. Такая особенность делает нашу крепость просто отличным место для создания предметов. Мы можем сделать: еду, зелья, свитки, доспехи, оружие.
Летопись замка
За всё время игры в замке ведётся запись всех событий, которые происходили. Вы легко можете открыть журнал и посмотреть кто и когда на вас нападал, что уничтожили, что разграбили и так далее.
Notes[]
- A few notes regarding the hold:
- Mechanics 9 will open ANY door.
- Stealth 4 on all the members of your party can prevent any fight.
- Resolve 18 or Intellect 12 will give you full access to the chapel.
- Your actions while completing this quest will slightly affect the quest The Champion of Berath depending on your Journal Entry.
- Having a bad reputation with the Gilded Vale will trigger instant aggro from Kolsc and Raedric leading to the 3002 entry in your Journal no matter what you do.
- If you kill Osrya and then talk to Giacco and tell him she is dead (avoid answer 1), you will receive for that, and another when you tell him he is free (answer * If you kill Giacco (before speaking to him, because he will disappear after the dialogue), he will drop Skaen Cultist Robes and around 50 cash.
- In the room with Osrya, you can find a non-aggressive Black Cat, that you can speak to (discovering that it is a zombie cat), and when you pick it up, it is added to your inventory as pet.
Manifestations[]
Woedica is usually depicted with burned and withered skin, having been cast from her rightful seat by war and burned in Magran’s fire. Nevertheless, she retains her dignity and plots her «rightful» revenge. She has no allies among the other gods, believing they owe her fealty. However, Skaen is associated with her, though the exact nature of their relationship is unclear.
Woedica manifests in the world as the Strangler, a leathery-skinned old woman, always clad in tattered finery, who appears on an empty road or abandoned alleyway to murder those who break a solemn oath. According to those few that claim to have seen her, she is supernaturally agile and quick while possessing the strength to strangle a full grown aumaua. Woedica’s avatar is believed to have slain several usurpers in Dyrwoodan history, though it is possible that the real murderers merely blamed the goddess. For this reason, oath breaking is punished by strangulation in many cultures.
Companion quests[]
Every scripted companion has a personal side-quest that you can complete together with them:
| Quest | Companion | Start location | Notes |
|---|---|---|---|
| Fragments of a Scattered Faith | Edér | Gilded Vale | Requires completion of Visions and Whispers. |
| The Trials of Durance | Durance | Magran’s Fork | Appears not before starting The Old Watcher. |
| Time and Tide | Kana Rua | Caed Nua | |
| The Long Hunt | Sagani | Woodend Plains | |
| The Child of Five Suns | Pallegina | Ondra’s Gift | Requires completion of At All Costs. |
| Two-Sided | Aloth | Copperlane – Copperlane Catacombs | Requires completion of Never Far from the Queen. |
| Dream and Memory | Grieving Mother | Dyrford Village | |
| True to Form | Hiravias | Stormwall Gorge | Talk to him after he joins party. |
| The One That Got Away | Devil of Caroc | Durgan’s Battery – Galvino’s Workshop | |
| Secrets of the Tacan | Zahua | Stalwart Village | Talk to him after entering and exhausting all his dialogue options. |
| The Burden of Memory | Maneha |
Руководство по классам
Приятным плюсом является наличие нескольких классов — каждый игрок сможет выбрать тот вариант, который подходит ему лучше всего.
- Авантюрист — использует скрытые атаки, быстро нанося врагам максимальный урон.
- Боец — ориентируется на ближний бой, выполняя мощные атаки надежным оружием.
- Варвар — безжалостный персонаж, одолеть которого сложно благодаря запасу здоровья.
- Волшебник — тактик, отличающийся острым умом. Применяет мощные заклинания, позволяющие победить любого противника.
- Друид — меняет облик, превращаясь в животных или мифических персонажей.
- Монах — обладают богатым набором приемов для уничтожения врагов вблизи.
- Паладин — воин, преданный святому делу, готовый достичь цели любой ценой.
- Певчий — вдохновляет своих союзников балладами, повышая их боевой дух.
- Рейнджер — применяют оружие дистанционного боя. Путешествую с дрессированными животными-спутниками, атакующими противника на малой дистанции.
- Сайфер — гипнотизирует людей, способен манипулировать ими.
- Священник — выполняют роль лекарей, накладывая на союзников полезные заклинания.
References[]
- Fig Update # 17 — The Last Few Hours! Our 8th Companion, New Stretch Goal, and Key Announcements!
- Ydwin in Harbingers’ Watch: «I left the Land due to exactly this manner of nonsense. Our people have likely been chanting about the coming of the final winter for ten thousand years.»
- Ydwin on Vailian Republics: «The Republics take the most progressive attitude towards the subject, and thus they attract its foremost scholars. Among whom I count myself.» and «They were the true treasure of the Republics. The collected histories, dramas, and comedies of Old Vailia. The most advanced arcane theories of Aedyr.»
- When asked why she left the Vailian Republics: «Increased tensions between the Republics and the Dyrwood, for one. I had little interest having my experiments disrupted by some grudge-bearing bricklayer from Defiance Bay.» and «Mostly, though, my studies demanded more luminous adra than I could afford to import. So I sought out the source.»
- When asked about her area of study: «As an apprentice, I focused on — and then helped discredit — the phrenological approach.» and «Some of my — colleagues — had a vested interest in a model of the world that included an inherent hierarchy of kith. That some kith made more worthy receptacles for souls than others — based on the shape of their brow or the length of their ears — was apparently an idea too tantalizing to abandon.» and «Afterwards my interests turned to the theoretical, before shifting a few decades later to the study of parapsychological inertia.» and «From there I moved on to work in meta-mortality, the scientific study of souls over lifetimes and the cycle of reincarnation.»
Walkthrough[]
This quest requires the player character to experience two visions to learn about Durance. Progress in this quest is made through conversing with Durance after with him in the party. Note that it is necessary to camp – resting at an won’t trigger the visions.
First vision
This triggers 3 rests into Act 1, or after Act 2 has begun. Exhaust all dialog options after confronting Durance about the vision.
|
You awake to see Durance, his staff held in both of his hands before him. A flame flickers at its top end, casting long shadows across his face as he stares in contemplation. Still, for all the light of the fire, your eyes can’t focus on him… perhaps it is awakening from sleep, or a trick of the light, but he seems… indistinct, blurred around the edges, everything except for the staff. The staff… he seems to be studying its engravings. As you watch, the engravings glow thinly red, like through the cracks of heat-suffused wood. The lines stream like molten metal, burning along the edges of his staff, then branch out in an intricate series of fiery veins, bunching thickly where his hands clutch the wood, pulsing as if a heartbeat. As you watch, the veins spiral into a dozen, separate circles… circles that spiral again until they are arranged in a circle of their own. They pulse, wait, and all is strangely silent… and… And then, suddenly, there is a great light from the fire, a rushing of air, a great flash… and you awaken again, to see Durance in the same place, still holding his staff, but he is solid, real. He doesn’t seem to have noticed you… or reacted to what occurred. |
Second vision
In the second cut-scene, the Watcher again wakes up to find Durance staring at his staff. This triggers 3 to 6 rests into (or after) Act 3. Exhaust all dialog options after confronting Durance about the vision.
|
Your eyes open to a familiar scene. Durance sits with his staff laid across his lap, a malignant flame sprouting from one end. He is difficult to make out, his features soft, bleeding together. But the staff you can see clearly, its etchings aglow in molten orange. Though Durance’s face is difficult to distinguish, there is no mistaking the hardened expression, the furrowed brow. His voice hisses and sputters, low and unintelligible, as though having a private argument with the staff. Traces of spittle catch the firelight as they fly from his lips like sparks. …and to your surprise, there is a female figure behind him. You are about to call out a warning, when you realize it is the Magran statue where you met Durance at the Fork… Yet… she seemed almost… alive for a moment… her cast shadow seemed as if it was moving, cloaked, then it is still, frozen with the night at its back. There is something odd about one of the symbols. A circle of twelve smaller circles. One of the small circles glows brightly, but the other eleven give off little light. They flicker and fade like dying embers. Between his hissing curses, Durance lowers his face close to the staff and blows on the fading circles with panicked rapidity, coaxing light from them, but they do not ignite. One by one, the light of the circles dies, and smoke rises from their ashes. Only one still burns. Durance hurls his staff at his feet, and it clatters to the ground. Its edges have become soft, difficult to find. Like its owner, the staff has become a blur. You close your eyes and reopen them, and Durance is there, picking up his staff from the ground, but the blur is gone, and you are awake. |
Final conversation
After the two visions, you need to complete Council of Stars and speak with Durance a third time. Your choices affect his .
- First ask Durance, «Does what we learned about Woedica trouble you?»
- Select any dialog options EXCEPT for «I’m not certain — it’s just a feeling I have» to convince Durance of the plot between Woedica and Magran.
- Exhaust all other dialog options. This will complete the quest.