How to create «minecraft» maps with worldpainter
Содержание:
- Mixing Populate with other layers
- How do I make the borders of the map look nice and integrate well with the Minecraft landscape?
- Loading a Height Map
- Create a New Minecraft World
- Apple Java Extensions
- Set up Maven toolchains
- Build WorldPainter
- Creating a World from a Height Map
- Les bases de World Painter
- Creating a Filter
- Change Other Map Settings
- What it does
- How do I edit existing Minecraft maps?
- JIDE Docking Framework
- How do I change what Minecraft does when I use Populate? How do I get rid of all the small water and lava lakes?
- How do I change the water level on an existing world or map?
- Applying a Terrain Type Directly
- Export from the command line
Mixing Populate with other layers
If you mix Populate with the other layers and features of WorldPainter (some of which are enabled by default) you might get unexpected or unintended results. It’s important to know what it does and what the consequences are.
For instance, WorldPainter by default already generates underground ores, water and lava (as controlled by the Resources layer, which is turned on everywhere by default on the Dimension Properties or Export screen). If you leave that turned on, and then also use Populate, you will get double the resources. This may or may not be what you want, but you should be aware of it.
Another example is forests. If you use one of WorldPainter’s tree layers (Deciduous, Pine, Swamp or Jungle), WorldPainter will generate trees in those areas (with a size and density determined by the intensity with which you painted the layer). By default (if «automatic biomes» is enabled), it will also set the biome in those areas to «forest» (or «taiga» if you also use the Frost layer in the same area). That means that if you use Populate in the same location, or enable «allow Minecraft to populate the entire terrain», Minecraft will also generate trees there and you will get double the amount of trees! Again this may or may not be what you want, but you should be aware of it.
How do I make the borders of the map look nice and integrate well with the Minecraft landscape?
When you leave the WorldPainter-generated chunks, Minecraft will start generating land again, according to the seed you specified and its own algorithms. There is nothing WorldPainter can do to avoid that. If you don’t take this into account, the edges or seams between your world and the Minecraft world may be very abrupt and ugly. There are several strategies for making the seams look good:
- Make the edges of your world all water, and use the «ocean» Minecraft seed option (the default) on the New World screen. Make sure to use the default water level for your world (62) and make the water depth around the edges at least fifteen blocks so it will match the ocean floor better. This will embed your world into a huge ocean and since the seams are all water they will be almost unnoticeable. Note that this does mean that there will be no other continents anywhere nearby though!
- Configure a border on the Export screen. Note that this doesn’t get rid of the seams, it just moves them further away. Also note that if the edges of your world are land (instead of water), or if the water level of your map is different than the border level, there will still be an ugly edge between your land and the border.
- Use the «bedrock wall» option on the Export screen to make it hard to leave your world. Note that it is still possible to leave it, since you can just build your way to the top of the wall and walk right over it. And of course it means an ugly wall all around your world. You can combine this option with a border, so that you at least can’t see the wall from the shores of your world.
- Use the Import/Merge functions to smooth the seams after the fact:
- Export your world
- Load it in Minecraft, and fly along all the edges, forcing Minecraft to generate all the chunks around the edges
- Import the map into WorldPainter using Ctrl+I or File -> Import -> Existing Minecraft map…
- Use the Smooth tool, terrain tools, and any other tool of your choice to merge and smooth the seams
- Select the Read-only layer, select a large and solid brush and set the intensity to full, and paint the entire interior of the world with the Read-only layer. This will greatly speed up the merge process. Be careful not to mark any chunks near the seams read-only though, as your edits in those chunks would be lost
- Merge the changes with the original map using Ctrl+R or File -> Merge World…
- The downside of this is that changing the slope of the land will mess up any trees that were on it. You’ll have to visit all the seams again in Minecraft to manually fix problems introduced by the merge
Loading a Height Map
There are several operations which take a height map as input. Here is how to load one:
var heightMap = wp.getHeightMap()
    .fromFile('path/to/heightmap/myheightmap.png') // The filename of the height map to load. Supported formats are dependent on the Java platform, but usually include at least PNG and TIFF
    .selectRedChannel() // Optional. If the image is not a grayscale image you may invoke ONE OF selectRedChannel(), selectGreenChannel() or selectBlueChannel() to indicate which channel should be used to read values from. This is the default for colour images
    .selectGreenChannel() // Optional. If the image is not a grayscale image you may invoke ONE OF selectRedChannel(), selectGreenChannel() or selectBlueChannel() to indicate which channel should be used to read values from. The default is to use the red channel for colour images.
    .selectBlueChannel() // Optional. If the image is not a grayscale image you may invoke ONE OF selectRedChannel(), selectGreenChannel() or selectBlueChannel() to indicate which channel should be used to read values from. The default is to use the red channel for colour images.
    .go(); // Returns the loaded height map for use in other operations
Create a New Minecraft World
While opening WorldPainter starts users with a default Minecraft world, you can generate a more specific seed if desired. This option makes it easier to generate themed worlds and change the default terrain of the map. To start a new Minecraft world:
- Left-click on the “File” menu option.
- Left-click on “New World”.
- Alter the topography and materials.
- Left-click “Create” to generate the world/
You can experiment with many different settings here by doing a number of different things, including:
- making your world hilly or flat
- Raising and lower the water level
- Changing all water into lava
- Placing beaches around water
Most importantly, there is the option to change the surface material of the map, from grass to sand to cobblestone and more.

Using a solid, round brush will paint on grass more realistically than other brushes.
Apple Java Extensions
To integrate with Mac OS X on Java 8, the Apple Java Extensions are needed. They are proprietary code which cannot be distributed by us so you will have to download it manually and install it in your local repo the same way as above. They can currently be found here. Download the file and extract the file from it. Install it in your local repo with the following command:
mvn install:install-file -DgroupId=com.apple -DartifactId=AppleJavaExtensions -Dversion=1.6 -Dpackaging=jar -Dfile=AppleJavaExtensions.jar
Of course if you are not interested in running the code on Apple Mac OS X, or running it on Java 8, you can also just remove this dependency and the code that uses it. WorldPainter will still run on Mac OS X on Java 8, but it will be less well integrated into the menus.
Set up Maven toolchains
WorldPainter uses the Maven toolchain framework (https://maven.apache.org/guides/mini/guide-using-toolchains.html) to find the JDK’s it needs. You need to follow the instructions on that page to configure two toolchains: one of type and version pointing to a Java 8 JDK, and one of type and version pointing to a Java 9 JDK. You can do this by placing a file called in your or directory with the following contents:
<toolchains>
        <toolchain>
                <type>jdk</type>
                <provides>
                        <version>9</version>
                </provides>
                <configuration>
                        <jdkHome>PATH TO JAVA 9 JDK</jdkHome>
                </configuration>
        </toolchain>
        <toolchain>
                <type>jdk</type>
                <provides>
                        <version>1.8</version>
                </provides>
                <configuration>
                        <jdkHome>PATH TO JAVA 8 JDK</jdkHome>
                </configuration>
        </toolchain>
</toolchains>
Build WorldPainter
Once all dependencies are installed and the toolchains set up you can build WorldPainter from the command line or using your favourite IDE:
Creating a World from a Height Map
Creating a new world from a height map:
var world = wp.createWorld()
    .fromHeightMap(heightMap) // See "Loading a Height Map"
    .scale(100) // Optional. The % at which to scale the height map. Default value: 100%
    .shift(, ) // Optional. The number of blocks the height map should be shifted east and south respectively (negative numbers shift west and north). Default value: 0, 0
    .fromLevels(, 255).toLevels(, 255) // Optional. Specifies how image values should be mapped to surface heights. The first two values are the lower and upper bounds of the range of image values; the second pair of values if the corresponding range of surface heights those image values should be mapped to. The default is to map the values one on one
    .go(); // Returns the created world for exporting, saving or using in other operations
Note that WorldPainter supports 16-bit height maps! You can import them to create worlds with high resolution height information, which will make smooth snow look better and editing work more smoothly. You’ll need to tell WorldPainter to map the full range of the height map (or any other desired range) to the full range of the world height though, by setting fromLevels() and toLevels() like this:
.fromLevels(, 65535).toLevels(, 255)
Les bases de World Painter
Malgré l’interface accessible à tous, comptez tout de même une bonne heure avant de prendre connaissance des bases du logiciel : le résultat final variera bien sûr selon la minutie dont vous avez fait preuve.
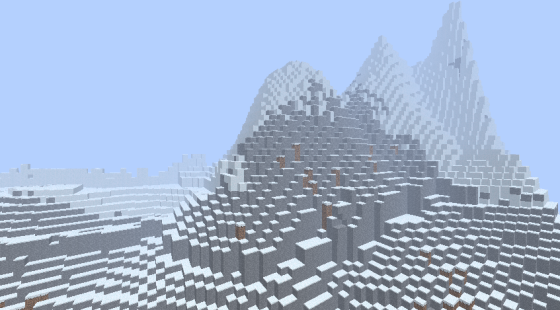 Une chaine de montagne générée par World Painter
Si vous désirez percer dans l’originalité, vous pouvez vous servir des fonctionnalités du logiciel pour créer des volcans, des monts habitables, des pyramides glacées… C’est à vous de faire marcher votre imagination et de fixer vos limites !
Le programme est très simple d’utilisation. Les boutons à gauche servent a sélectionner l’outil, les clics gauche et droit à utiliser les outils (le bouton droit ayant la fonction inverse du gauche, pour surélever ou creuser le terrain)
La fonction « Load » (charger) et « Save »(sauvegarder) utilisent le format WorldPainter. Ce format pourra changer et l’avenir et ne plus être compatible avec vos maps actuelles
La fonction « Export » exporte les maps au format Minecraft dans le dossier spécifié. Elles peuvent être exportés directement dans le dossier de sauvegarde ou dans un autre emplacement.
20 façon d’utiliser le logiciel Worldpainter.
Creating a Filter
The height map, layer and terrain application operations described above can take a filter. Here is how you create one:
var filter = wp.createFilter()
    .aboveLevel() // Optional. Apply the operation only at and above the specified terrain level
    .belowLevel(255) // Optional. Apply the operation only at or below the specified terrain level
    .feather() // Optional. When applying a continuously-valued layer, let it fade out around the specified terrain levels, instead of being cut off sharply
    .aboveDegrees() // Optional. Mutuatlly exclusive with belowDegrees(). Specifies the slope in degrees above which the operation must be applied. PLEASE NOTE: only works well with worlds created from high res (16-bit) height maps or sculpted manually in WorldPainter!
    .belowDegrees() // Optional. Mutuatlly exclusive with aboveDegrees(). Specifies the slope in degrees below which the operation must be applied. PLEASE NOTE: only works well with worlds created from high res (16-bit) height maps or sculpted manually in WorldPainter!
    .onlyOnTerrain() // Optional. Mutually exclusive with all other onlyOn* and exceptOn* conditions. Specifies the terrain index of the terrain on which the operation should only be applied
    .onlyOnLayer(layer) // Optional. Mutually exclusive with all other onlyOn* and exceptOn* conditions. Specifies the layer which must be present for the operation to be applied
    .onlyOnBiome() // Optional. Mutually exclusive with all other onlyOn* and exceptOn* conditions. Specifies the biome ID of the manually painted biome on which the operation should only be applied
    .onlyOnAutoBiome() // Optional. Mutually exclusive with all other onlyOn* and exceptOn* conditions. Specifies the biome ID of the automatically set biome on which the operation should only be applied
    .onlyOnAutoBiomes() // Optional. Mutually exclusive with all other onlyOn* and exceptOn* conditions. Specifies that the operation must only be applied on automatically set biomes
    .onlyOnWater() // Optional. Mutually exclusive with all other onlyOn* and exceptOn* conditions. Specifies that the operation must only be applied on flooded areas
    .onlyOnLand() // Optional. Mutually exclusive with all other onlyOn* and exceptOn* conditions. Specifies that the operation must only be applied on dry areas
    .exceptOnTerrain() // Optional. Mutually exclusive with all other onlyOn* and exceptOn* conditions. Specifies the terrain index of the terrain on which the operation must NOT be applied
    .exceptOnLayer(layer) // Optional. Mutually exclusive with all other onlyOn* and exceptOn* conditions. Specifies the layer which must NOT be present for the operation to be applied
    .exceptOnBiome() // Optional. Mutually exclusive with all other onlyOn* and exceptOn* conditions. Specifies the biome ID of the manually painted biome on which the operation should NOT be applied
    .exceptOnAutoBiome() // Optional. Mutually exclusive with all other onlyOn* and exceptOn* conditions. Specifies the biome ID of the automatically set biome on which the operation should NOT be applied
    .exceptOnAutoBiomes() // Optional. Mutually exclusive with all other onlyOn* and exceptOn* conditions. Specifies that the operation must only be applied on manually painted biomes
    .exceptOnWater() // Optional. Mutually exclusive with all other onlyOn* and exceptOn* conditions. Specifies that the operation must only be applied on dry areas
    .exceptOnLand() // Optional. Mutually exclusive with all other onlyOn* and exceptOn* conditions. Specifies that the operation must only be applied on flooded areas
    .go();
For an overview of the actual terrain type indices to use in onlyOnTerrain() or exceptOnTerrain() and the terrain types to which they correspond, see this page. For an overview of the biome IDs to use in onlyOnBiome(), onlyOnAutoBiome(), exceptOnBiome() or exceptOnAutoBiome() see page.
Change Other Map Settings
If you are feeling extra creative, you can test out the additional map options located under the menu bar at the top of the WorldPainter program. These tools have more to do with the properties of the Minecraft map, such as editing the dimensional properties, enabling and disabling the max far view distance and rotating the map. Here is the full list of options:
- Edit the properties of this dimension
- Raise or lower the entire map
- Rotate the entire map by quarter turns
- Add or remove tiles
- Move the view to the spawn point
- Move the view to the origin
- Enable or disable the grid
- Enable or disable height contours
- Enable or disable image overlay
- Enable or disable showing the maximum (far view) distance
- Enable or disable showing the five minute, one day and one day and one night walking distances
- Rotate the direction the light comes from anticlockwise
- Rotate the direction the light comes from clockwise
Editing the properties of the dimension really allows user to fully customize their Minecraft map. You can have a border of water, lava, or even a void to keep players trapped in. You can choose to have underground caverns everywhere, and even to have them break the surface! Depending on the type of map you are making, this tool can really help you set the theme.
What it does
Biomes (in Minecraft) are different combinations of temperature, precipitation, vegetation type, etc.. They are stored per horizontal (x, z) coordinate (in other words, per column of blocks) and they influence the colour of grass and leaves, whether it rains, snows or is dry, whether water freezes and which mobs will spawn.
When Minecraft generates land, it does so in two steps:
In step one, it calculates the biomes according to its own world generating algorithm and then generates the actual land mass, surface terrain (grass, sand, etc.), river or ocean water and caves, according to the biome. Since WorldPainter pre-generates the chunks, Minecraft never performs this step for those chunks.
In step two, the «populate» step, Minecraft adds underground resources (ores, lava and water lakes), creates the vegetation (trees, tall grass, mushrooms, flowers, lily pads, etc.), small lava and water lakes on the surface and structures (abandoned mines, NPC villages, strongholds, dungeons and desert and jungle temples). It does this according to the biome settings stored in the chunk. This second step can be performed by Minecraft on chunks generated by WorldPainter, because there is a flag for each chunk in the map data telling Minecraft whether that chunk has been populated yet.
This second step is what the Populate layer controls. If you paint the Populate layer on a chunk, or check «allow Minecraft to populate the entire terrain», WorldPainter will turn off the flag saying the chunk is already populated for that chunk (or all chunks), which will cause Minecraft to populate it the first time it loads the chunk. If you don’t use Populate, the chunk will be left as it is (which may include trees, etc. generated by WorldPainter using the other layers) when it is loaded by Minecraft.
Exactly what Minecraft will do depends on the biomes you painted (or WorldPainter chose automatically) for that chunk. Note that all WorldPainter can do is tell Minecraft to populate the chunk, or not populate the chunk. It has no control over what Minecraft will do exactly. For instance, there is no way to tell it not to generated surface lakes of water or lava. If you don’t want those, your only option is not to use Populate.
Note that whether or not you use Populate, the biomes will still determine the colour of grass and leaves, whether it will rain or snow or be dry, whether water will freeze and what kinds of mobs will spawn.
How do I edit existing Minecraft maps?
WorldPainter is a map generator, not an editor! The basic idea is to use it for generating new maps which you then edit with other tools such as creative mode, WorldEdit, VoxelSniper or MCEdit.
Having said that, WorldPainter does have limited support for making changes to existing maps, using the Import and Merge operations. Import (Ctrl+I or File -> Import -> Existing Minecraft map…) will create a new WorldPainter world based on the landscape (terrain height and type and biome information, but no underground or above ground structures, trees, etc.) of an existing map. Merge (Ctrl+R or File -> Merge world…) will merge any changes you make back to the existing map.
Important notes:
- You have to use Merge (Ctrl+R), not Export, to save your changes back to the existing map!
- When Importing an existing map, any chunks containing man-made blocks will be marked read-only, visible by a black cross across them. This includes underground blocks from mines and strongholds. Chunks that are marked read-only are not merged during the Merge process. You can still make changes to them in the editor, but those changes won’t be saved. This is to protect man made structures from the merge process, which can be destructive and mangle structures, especially if you changed the slope of the terrain. If you still want to make changes to those chunks (at your own risk), you can remove the read-only layer (like any other layer: select the Read-only button and right-click to remove it). Note that you can also add the read-only layer to areas where you don’t intend to make changes, which will speed up the merge process.
JIDE Docking Framework
For the docks, WorldPainter uses the JIDE Docking Framework (http://www.jidesoft.com/products/dock.htm), which is a commercial product. For development, you can download an evaluation version of the product here, with user ID and password documented here. The evaluation version will expire after two months, but you can keep downloading it again whenever it expires for two more months of development time.
Once you have your copy, either the evaluation version or the release version, install the , and files in your local Maven repository by executing the following commands from inside the directory where you extracted them:
mvn install:install-file -DgroupId=com.jidesoft -DartifactId=jide-plaf-jdk7 -Dversion=3.7.3 -Dpackaging=jar -Dfile=jide-plaf-jdk7-3.7.3.jar
mvn install:install-file -DgroupId=com.jidesoft -DartifactId=jide-dock -Dversion=3.7.3 -Dpackaging=jar -Dfile=jide-dock-3.7.3.jar
mvn install:install-file -DgroupId=com.jidesoft -DartifactId=jide-common -Dversion=3.7.3 -Dpackaging=jar -Dfile=jide-common-3.7.3.jar
Note: if you downloaded a different version than 3.7.3 you must use the correct version numbers in these commands, and update the version numbers in the pom.xml of the WPGUI module!
If you ever want to distribute your own version of WorldPainter (although I respectfully request that you don’t), you’ll have to download the release version of the framework and get your own licence. JIDE Software give out open source licences, which are free. When using the release version of the framework, you have to create a file called in the WPGUI module to fill in your actual licence details. It should have the following contents, filling in the actual values in place of the texts after the equals signs:
companyName=<company name>
projectName=<project name>
licenceKey=<licence key>
Note: make sure not to commit that file to any publicly visible source code repository, as your licence is associated with you and may not be used by other people!
Alternatively you could remove the JIDE Docking Framework from the code and replace it with some alternative docking framework. It’s a lot of work, but doable.
How do I change what Minecraft does when I use Populate? How do I get rid of all the small water and lava lakes?
The small water and lava lakes aren’t created by WorldPainter, they are created by Minecraft when you use the Populate layer, or enable the «allow Minecraft to populate the entire terrain» option. WorldPainter has no control over what Minecraft does when it populates a chunk, at least not for the Default and Large Biomes world types. All it can do is tell it to populate the chunk, or not, for each individual chunk. If Minecraft populates a chunk it will add underground resources, vegetation, trees, small water and lava lakes, snow and ice, villages, ravines, strongholds and abandoned mines. It will not generate caves. For more details about the proper use of the Populate layer, see the Populate page.
If you don’t want the small water and lava lakes, you do have one option: you can set the world type to Superflat, and then use the Superflat preset to configure exactly what you want Minecraft to do during the population step. For more details about this technique, see this YouTube video by Fornan II.
You should also consider whether you need Populate, as WorldPainter has its own layers for almost everything. The only thing that WorldPainter can’t generate itself is structures (mines, villages, etc.). By default the Resources layer is «on everywhere», so WorldPainter already generates underground resources. You can use the other layers to add things like Deciduous or Pine forests, snow and ice, underground Caverns and Chasms, etc.
How do I change the water level on an existing world or map?
The first step is to change the default water level setting by opening the Dimension Properties (Ctrl+P or Edit menu), going to the Theme tab and adjusting the number at the bottom of the screen. You may have to temporarily enable «beaches around water level» to be able to change the setting.
Then you have a choice. You can either reset the water level across the entire world in one go with the Global Operations tool , or you can adjust the water level manually using the Flood and/or Sponge tools.
To reset the water across the world in one go, open the Global Operations tool (Tools panel or Ctrl+G), select «reset all water or lava» and press Go. The advantage of this is that it’s quick and thorough, and it also resets the groundwater level in dry areas, so that the water level remains correct even if you change the elevation of currently dry areas. The downside is that it will remove all lava, and bodies of water that were above sea level, and will flood valleys that are below sea level.
To do it manually, use the Flood tool to raise the level of bodies of water by left-clicking on them, or lower them by right-clicking on them. Be careful not to interrupt the flooding operation, that may cause tiles with incorrect water levels to be left behind. You can also use the Sponge tool: right-clicking with it will reset the water level to the default in the area covered by the brush. Left-clicking the Sponge tool removes the water (or lava) altogether.
Applying a Terrain Type Directly
A terrain type can also be applied to a world directly, without a height map but optionally with a filter:
wp.applyTerrain() // The terrain type index to set
    .toWorld(world) // See "Loading a World" or "Creating a World from a Height Map"
    .withFilter(filter) // Optional. Specifies conditions for where the layer will be applied. See below for details about creating a filter
    .applyToSurface() // Optional. Mutually exclusive with applyToNether() and applyToEnd(). Indicates that the layer should be applied to the Surface dimension. This is the default
    .applyToNether() // Optional. Mutually exclusive with applyToSurface() and applyToEnd(). Indicates that the layer should be applied to the Nether dimension
    .applyToEnd() // Optional. Mutually exclusive with applyToSurface() and applyToNether(). Indicates that the layer should be applied to the End dimension
    .go();
For an overview of the actual terrain type indices to use in applyTerrain() and the terrain types to which they correspond, see this page. Note that if you want to include Custom Terrain types which aren’t already present in the world, you must install the Custom Terrain type on the world first (see «Installing a Custom Terrain» above) and that operation will return the terrain index to use for that particular Custom Terrain.
Export from the command line
If none of the above worked and you’re comfortable getting your hands dirty on the command line, you can try using a script to export the world instead of using WorldPainter. Scripts use less memory than WorldPainter proper, so they might succeed if WorldPainter does not. Using a text editor, create a file in the directory where your .world file is stored, named , with the following contents:
var world = wp.getWorld().fromFile(argv1]).go();
wp.exportWorld(world).toDirectory('.').go();
Then export the world by opening a terminal or command prompt window, navigating to the directory where your .world file is stored, and executing the following command. For more information about what the «command prompt» is and how to access and use it on Windows, see this page. Similar information can be found for Mac OS X and UNIX/Linux. Google is your friend.
wpscript exportworld.js "MyWorldName.world"
Where is the name of your .world file, in double quotes in case the name contains spaces. This will export the map to a subdirectory of the current directory (which is the directory in which your .world file is stored), which you will then have to move to the Minecraft directory manually. You don’t have to use the command line for that; you can drag and drop it.
Note: the export script operation gives no progress feedback. This is normal, but it means there is no way to tell visually whether it is hanging or not, or how far along it is. Instead you should regularly check the total size of the files in the map directory it has created (on Windows you can do that by opening the properties of the folder in Explorer) to check whether it keeps steadily increasing.
Note: with this method you cannot change the export settings from WorldPainter’s Export screen. Those settings are stored in the .world file, so you can change them by starting an export with the desired settings in WorldPainter, immediately cancelling the export, and then saving the .world file. If you then export it with the script method the same settings will be used as for the aborted export.